Let me guess. You’ve been watching those satisfying bread-baking videos online. The flour clouds, the gentle kneading, the golden crusts cracking as they cool. And you’ve thought, “I want to do that.”
But then the doubts creep in. Yeast seems mysterious. You’re worried about dense, brick-like results. Maybe you tried once before and ended up with something that could double as a doorstop.
I’ve been there. My first loaf of bread was so dense my husband jokingly asked if he could use it for weightlifting. But here’s what I learned: bread baking isn’t about perfection. It’s about understanding a few simple principles and starting with recipes that build confidence rather than test it.
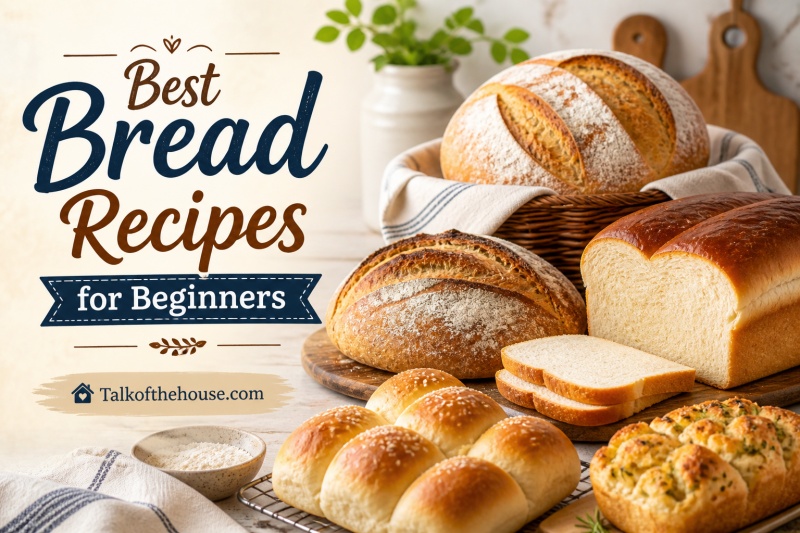
That’s exactly what this guide delivers. The best bread recipes for beginners aren’t the fancy artisan loaves you see in French bakeries. They’re the forgiving, straightforward recipes that teach you fundamentals while delivering delicious results every time.
In 2026, there’s no better time to start your bread baking journey. Whether you want crusty artisan loaves, soft sandwich bread, or quick same-day results, these six recipes will take you from nervous novice to confident home baker.
Table of Contents
Quick Picks: The Easiest Breads at a Glance
Before we dive into each recipe, here’s a quick comparison to help you choose your first bake. These are ranked from absolute easiest to slightly more involved.
| Bread | Difficulty | Total Time | Active Time | Equipment Needed | Best For |
|---|---|---|---|---|---|
| Irish Soda Bread | Easiest | 45 min | 10 min | Baking sheet | Immediate gratification |
| No-Knead Crusty Bread | Easiest | 12-24 hrs | 5 min | Dutch oven (or covered pot) | Impressive results, minimal effort |
| Cinnamon English Muffin Bread | Easy | 75 min | 10 min | Loaf pan | Breakfast toast favorite |
| Easy Focaccia | Easy | 90 min | 10 min | Baking sheet | Same-day satisfaction |
| Soft Dinner Rolls | Easy | 2 hrs | 20 min | Baking dish | Learning to shape dough |
| Classic Sandwich Bread | Easy-Moderate | 3 hrs | 15 min | Loaf pan | Daily bread skills |
The no-knead and soda bread recipes are your best starting points if you want immediate success with minimal technique. The sandwich bread is perfect when you’re ready to learn traditional kneading.
1. No-Knead Crusty Artisan Bread – The Gateway Recipe
This is the recipe that changed home baking forever when Mark Bittman popularized Jim Lahey’s method. It requires no kneading, no special skills, and produces a loaf that looks like it came from an artisan bakery.
The secret is time. Instead of working the dough to develop gluten, you let a long, slow fermentation do the work for you. The dough sits for 12 to 24 hours, developing flavor and structure while you sleep, work, or live your life.
What you’ll need: 3 cups all-purpose flour, 1/4 teaspoon instant yeast, 1 1/4 teaspoons salt, and 1 1/2 cups cool water. That’s it.
Time commitment: 5 minutes of active work, 12-24 hours of waiting, 45 minutes of baking.
The process: Mix everything in a bowl until just combined. Cover and let it sit at room temperature for 12 to 24 hours. The dough will bubble and grow, looking shaggy and alive. When you’re ready to bake, shape it quickly into a ball, let it rest while your oven and Dutch oven preheat to 450°F, then bake covered for 30 minutes and uncovered for 15 minutes.
What you’ll learn: This recipe teaches you that bread is forgiving. It introduces you to wet, sticky dough (which intimidates many beginners) and shows you that time is your ally, not your enemy. You’ll also learn the importance of steam in creating a crackly crust, which the Dutch oven provides by trapping moisture.
Why beginners love it: You literally cannot over-knead because there is no kneading. You can’t really mess up the timing, anything from 12 to 24 hours works. And the result is genuinely impressive, a crusty, golden loaf with big airy holes inside.
No Dutch oven? You can use any heavy, oven-safe pot with a lid. A covered ceramic baker works. Some bakers even use a pizza stone with a metal bowl inverted over the dough. The key is trapping steam for the first part of baking.
2. Easy Focaccia – The Forgiving Flatbread
If you want same-day bread that still delivers that “I made this” pride, focaccia is your answer. This Italian flatbread is incredibly forgiving, requires no shaping skills, and welcomes improvisation with toppings.
What you’ll need: 4 cups all-purpose flour, 2 teaspoons instant yeast, 2 teaspoons salt, 1 3/4 cups warm water, and 1/4 cup olive oil.
Time commitment: 10 minutes active, 90 minutes total from start to finish.
The process: Mix the ingredients in a bowl until a shaggy dough forms. Let it rise for an hour until doubled. Pour it into an oiled baking sheet, stretch it to fit, dimple it with your fingers (creating those characteristic indentations), add toppings, let it rest 20 minutes, then bake at 425°F for 20-25 minutes.
What you’ll learn: This recipe teaches you to handle a wet, sticky dough without fear. The dimple technique shows you how to work with the dough rather than against it. You’ll also learn about oven temperature and how to tell when bread is done by color and sound.
Topping possibilities: Classic olive oil and flaky salt. Sliced cherry tomatoes and rosemary. Thinly sliced onions and thyme. Roasted garlic and parmesan. The toppings nestle into the dimples and become part of the bread.
Beginner tip: Don’t rush the first rise. The dough should truly double in size before you stretch it into the pan. If your kitchen is cool, this might take 75 minutes instead of 60. That’s fine. Bread waits for no one, but it rewards patience.
3. Irish Soda Bread – No Yeast Required
For the truly yeast-hesitant, Irish soda bread is the perfect confidence builder. It uses baking soda as the leavening agent, requires no rising time, and produces a rustic, hearty loaf in under an hour.
What you’ll need: 4 cups all-purpose flour, 1 teaspoon baking soda, 1 teaspoon salt, 1 3/4 cups buttermilk (or regular milk with a tablespoon of lemon juice or vinegar added).
Time commitment: 10 minutes active, 45 minutes total.
The process: Whisk dry ingredients together. Make a well, pour in the buttermilk, mix until just combined. Turn onto a floured surface, gently knead 4-5 times, shape into a round, place on a baking sheet, cut a deep cross in the top (this helps it cook through), and bake at 425°F for 35-40 minutes.
What you’ll learn: This recipe introduces you to working with chemical leavening rather than yeast. You’ll learn that overmixing creates toughness in quick breads, so a light hand is essential. The cross cut teaches you about how bread expands and how scoring controls that expansion.
The American version vs traditional: Traditional Irish soda bread contains just flour, buttermilk, salt, and baking soda. American versions often add raisins, caraway seeds, or a tablespoon of sugar. Both are delicious, choose based on your preference.
Doneness cues: The loaf should be deep golden brown. Tap the bottom, it should sound hollow. And if you have a thermometer, the internal temperature should reach 190°F.
4. Classic Sandwich Bread – Building Traditional Skills
Once you’ve mastered the no-knead method, it’s time to learn traditional kneading with this classic soft loaf. This is the bread you want for sandwiches, toast, and daily eating.
What you’ll need: 3 cups all-purpose flour (or 2 cups all-purpose plus 1 cup bread flour for extra structure), 2 1/4 teaspoons instant yeast, 1 tablespoon sugar, 1 teaspoon salt, 1 cup warm water, and 2 tablespoons butter.
Time commitment: 15 minutes active including kneading, 3 hours total with rising and baking.
The process: Mix dry ingredients, add wet, stir to form a shaggy dough. Turn onto a floured surface and knead for 8-10 minutes until smooth and elastic. Place in an oiled bowl, let rise 1-1.5 hours until doubled. Punch down, shape into a loaf, place in a greased 9×5 pan, let rise 45 minutes until the crown rises 1 inch above the pan. Bake at 350°F for 30-35 minutes.
What you’ll learn: This recipe teaches you proper kneading technique. Push the dough away with the heel of your hand, fold it back over itself, give it a quarter turn, repeat. You’ll learn to recognize when gluten is fully developed (the dough becomes smooth and springs back when poked). You’ll also learn about shaping a tight loaf that rises upward rather than outward.
The windowpane test: To check if you’ve kneaded enough, take a small piece of dough and stretch it gently. If it stretches thin enough to let light through without tearing, the gluten is developed.
Beginner tip: If your dough is sticking to everything, use a bench scraper (or the edge of a sturdy spatula) to help you fold and turn without adding too much extra flour. Too much flour makes dense bread.
5. Soft Dinner Rolls – Practicing Shaping
These individual rolls are perfect for learning to shape dough, and they offer quick satisfaction with a 2-hour timeline. Plus, everyone loves warm dinner rolls.
What you’ll need: 3 1/2 cups all-purpose flour, 2 1/4 teaspoons instant yeast, 3 tablespoons sugar, 1 teaspoon salt, 3/4 cup warm milk, 1/4 cup melted butter, and 1 egg.
Time commitment: 20 minutes active including shaping, 2 hours total.
The process: Mix everything except half the flour until smooth. Add remaining flour gradually until a soft dough forms. Knead 6-8 minutes until smooth. Let rise 45 minutes. Punch down, divide into 12 pieces, shape each into a ball (fold edges under, roll on the counter with a cupped hand), place in a greased 9×13 pan, let rise 30 minutes. Bake at 375°F for 15-18 minutes until golden.
What you’ll learn: This recipe teaches you to divide and shape individual portions. The cupped-hand rolling technique creates surface tension, which helps the rolls rise tall rather than spread wide. You’ll also learn about enriched doughs (those containing egg, butter, or milk), which are softer and more tender than basic lean doughs.
Shaping technique: To form a perfect roll, flatten the dough piece slightly, pull all edges to the center creating a little purse, then turn it seam-side down. Cup your hand over it, fingers touching the counter, and roll in a circle until the surface is smooth and tight.
Make ahead option: You can let these rise in the refrigerator overnight after shaping. Cover tightly with plastic wrap. The next day, let them sit at room temperature for 30 minutes before baking.
6. Cinnamon English Muffin Bread – Toast Perfection
This unique loaf replicates the texture of English muffins, complete with those signature nooks and crannies that catch butter and jam so perfectly. It’s made in a loaf pan and slices beautifully for toast.
What you’ll need: 3 cups all-purpose flour, 1 tablespoon sugar, 1 1/2 teaspoons salt, 1/4 teaspoon baking soda, 1 tablespoon instant yeast, 1 1/2 cups buttermilk (or milk with lemon juice), 2 tablespoons cornmeal for dusting, and 1 teaspoon cinnamon.
Time commitment: 10 minutes active, 75 minutes total.
The process: Mix all ingredients except cornmeal until just combined. The dough will be very sticky, more like a thick batter. Pour into a greased and cornmeal-dusted loaf pan. Dust the top with more cornmeal. Let rise 30-35 minutes until the crown reaches the rim of the pan. Bake at 400°F for 25 minutes until golden brown.
What you’ll learn: This recipe teaches you about wet doughs that you don’t knead. The cornmeal coating mimics the traditional English muffin cooking method. You’ll learn that not all bread requires the same handling techniques.
The nooks and crannies: The combination of yeast and a touch of baking soda creates the open, irregular crumb structure. When you toast a slice, those pockets get crispy while the interior stays soft.
Serving suggestion: This bread is designed for toasting. Slice it thick, toast until golden, and spread with plenty of butter. The cinnamon makes it perfect for breakfast, but it’s equally good with savory toppings.
Beginner’s Guide: Yeast, Flour, and Timing
Before you start baking, understanding a few fundamentals will dramatically improve your results. Here’s what every beginner should know.
Yeast 101: The Three Types You’ll Encounter
- Instant yeast (also called bread machine or rapid-rise yeast): This is what I recommend for beginners. It can be mixed directly into dry ingredients, no proofing required. It works faster than active dry, which means slightly shorter rise times. Store it in the freezer and it lasts for years.
- Active dry yeast: The traditional choice that requires proofing in warm water before using. This means dissolving it in warm water with a pinch of sugar and waiting 5-10 minutes until it gets foamy. If it doesn’t foam, your yeast is dead.
- Fresh yeast (cake yeast): Rarely needed for home baking. Found in the refrigerated section, it has a short shelf life. If a recipe calls for fresh yeast and you have instant, use one-third the amount.
- How to test yeast freshness: Mix 1 teaspoon yeast with 1/4 cup warm water (110°F) and 1/2 teaspoon sugar. Wait 10 minutes. If it doesn’t foam and smell yeasty, discard it and buy new yeast.
Flour Guide: All-Purpose vs Bread Flour
- All-purpose flour: The workhorse of home baking. With a protein content of 10-12%, it works for almost every beginner recipe. It’s what I used for all six recipes in this guide.
- Bread flour: Higher protein (12-14%) means more gluten development and a chewier texture. It’s great for sandwich bread and pizza dough but not essential for beginners. If you want to experiment, try replacing half the all-purpose with bread flour in the classic sandwich bread recipe.
- Whole wheat flour: Contains the entire wheat kernel, making it more nutritious but also denser. Beginner tip: if a recipe calls for all whole wheat, your first loaf might be heavy. Start with recipes that use half all-purpose, half whole wheat.
- Measuring flour correctly: The scoop-and-sweep method compacts flour, leading to dense bread. Instead, fluff the flour with a spoon, spoon it into your measuring cup, then level with a knife. Better yet, use a kitchen scale: 1 cup of all-purpose flour equals 120-125 grams.
Understanding Time: Active vs Inactive
Bread recipes list total time, but what matters more is active time, the minutes when you’re actually working. The no-knead bread takes 24 hours but only requires 5 minutes of your attention. The focaccia takes 90 minutes total with 10 minutes active.
Plan your bakes around the inactive time. Start no-knead bread before bed or before work. Make focaccia on a Saturday morning when you can be nearby during the rises.
Temperature matters: Yeast works fastest at 75-80°F. In a cool kitchen (below 70°F), rises take longer. In a warm kitchen (above 80°F), they happen faster. Both are fine, just adjust your expectations.
Equipment Essentials: What You Actually Need
The internet would have you believe you need a stand mixer, a Dutch oven, proofing baskets, and specialty tools. You don’t. Here’s the real breakdown.
Must-Have Basics
A large mixing bowl (8 quarts is ideal), a wooden spoon or sturdy spatula, measuring cups and spoons, a baking sheet, and a loaf pan (9×5 inch). That’s genuinely all you need to make every bread in this guide.
Why no stand mixer? Every recipe in this guide can be mixed by hand. In fact, kneading by hand teaches you what properly developed dough feels like. A mixer is convenient, but it’s a want, not a need.
Nice-to-Have Upgrades
A kitchen scale ($15-25) improves consistency dramatically. An instant-read thermometer helps you know when bread is truly done. A bench scraper ($5) makes handling dough easier. A second loaf pan lets you bake two sandwich loaves at once.
The Dutch Oven Question
For the no-knead crusty bread, a Dutch oven creates professional results by trapping steam. But any heavy, oven-safe pot with a lid works. I’ve used a cast iron camp Dutch oven, an enamel Le Creuset, and a basic ceramic baker with a lid. All produced beautiful bread.
If you have no covered pot, you can still make crusty bread. Bake on a preheated pizza stone or baking sheet, and create steam by placing a pan of hot water on the rack below. The crust won’t be quite as shiny, but the bread will still be excellent.
Troubleshooting Common Problems
Even with the best bread recipes for beginners, things sometimes go wrong. Here’s how to fix the most common issues.
“My Bread Is Dense and Heavy”
This is the #1 beginner complaint. Dense bread usually means one of three things: too much flour, not enough rise time, or dead yeast.
First, check your flour measurement. If you scooped directly from the bag, you likely used 30% more flour than the recipe intended. Use the spoon-and-level method or a scale next time.
Second, verify your yeast is alive using the test described earlier. Expired yeast won’t create the gas bubbles that lighten bread.
Third, be patient with rises. If your kitchen is cool, dough takes longer to double. Wait until it truly doubles in volume, not just until the timer goes off.
“My Dough Didn’t Rise”
Check the water temperature if you proofed yeast. Too hot (above 130°F) kills yeast. Too cold (below 100°F) slows it down. Aim for bathwater-warm, around 105-110°F.
Also check your salt. Salt strengthens gluten and controls yeast activity, but if it touches undissolved yeast directly, it can inhibit growth. Mix salt with flour before adding yeast.
Finally, consider your environment. If you tried to rise dough in the refrigerator (unless specified), it won’t work. Dough needs warmth to rise.
“How Do I Know When Bread Is Done?”
Visual cues matter. The crust should be deeply golden brown, not pale. The loaf should sound hollow when tapped on the bottom.
For precision, use an instant-read thermometer. Most breads are done at 190°F. Enriched breads (those with milk, butter, or eggs) are done at 190-200°F.
Don’t slice hot bread. I know it’s tempting. The smell is intoxicating. But cutting bread while hot damages the crumb structure and makes it gummy. Wait at least 30 minutes, preferably an hour.
“Can I Rescue Dough That’s Not Cooperating?”
If your dough is too sticky to handle, oil your hands instead of adding more flour. Oil doesn’t get absorbed like flour does, so you won’t dry out the dough.
If your dough is too dry and cracking, wet your hands and knead with damp hands. The water will gradually incorporate.
If your shaped loaf is spreading instead of rising tall, you didn’t create enough surface tension during shaping. Next time, pull the surface tighter. For now, you can gently reshape before baking.
Storage and Make-Ahead Tips
Fresh bread has a short shelf life at room temperature, usually 2-3 days. But with proper storage, you can extend that significantly.
Best Storage Methods
Store crusty artisan bread cut-side down on a cutting board. The crust protects the interior. Never store crusty bread in plastic, it makes the crust soft.
Store soft sandwich bread and rolls in a plastic bag at room temperature. The plastic keeps them soft.
Never store any bread in the refrigerator. The cold accelerates staling through a process called retrogradation.
Freezing Bread
Freezing is the best way to preserve homemade bread. Slice loaves before freezing so you can grab just what you need. Wrap tightly in plastic wrap, then foil, and freeze up to 3 months.
To thaw, leave slices at room temperature for 10 minutes or toast directly from frozen. For whole loaves, thaw overnight on the counter still wrapped.
Freezing Dough
You can freeze shaped dough before the final rise. After shaping, freeze on a baking sheet until solid, then transfer to a bag. When ready to bake, thaw in the refrigerator overnight, then let rise at room temperature until doubled. Bake as directed.
Freezing works best for enriched doughs like dinner rolls and sandwich bread. Lean doughs like no-knead and focaccia are best baked fresh.
FAQ: Your Bread Baking Questions Answered
What is the easiest bread for beginners?
No-knead crusty bread and Irish soda bread are the two easiest options for beginners. No-knead requires no technique, just time, and produces impressive artisan loaves. Irish soda bread uses no yeast at all and is ready in 45 minutes. Both deliver excellent results with minimal skill required.
What do I need to start baking bread?
You need just five basics: a large mixing bowl, measuring cups and spoons, a wooden spoon, a baking sheet, and a loaf pan. A kitchen scale and instant-read thermometer are helpful upgrades but not required. You do not need a stand mixer, Dutch oven, or any specialty equipment to make excellent bread.
How do I know if my yeast is still good?
Mix 1 teaspoon yeast with 1/4 cup warm water (105-110°F) and 1/2 teaspoon sugar. Wait 10 minutes. Active yeast will foam and smell yeasty. If nothing happens or only a few bubbles appear, the yeast is dead and should be replaced. Store yeast in the freezer to extend its life for years.
Why is my homemade bread so dense?
Dense bread usually results from three causes: measuring too much flour (scooping directly from the bag compacts it), using dead yeast, or not allowing enough rise time. Use the spoon-and-level method or a scale for flour. Test your yeast before using. Wait until dough truly doubles in size, even if it takes longer than the recipe states.
Do I need a stand mixer to make bread?
No. Every recipe in this guide can be made by hand. Mixing with a wooden spoon and kneading on the counter develops the same gluten as a mixer. In fact, kneading by hand teaches you what properly developed dough feels like. A mixer saves time but is never required for home bread baking.
What is the best flour for beginner bread?
All-purpose flour is the best choice for beginners. It works in every recipe in this guide and produces excellent results. Bread flour can be substituted for a chewier texture, but it’s not necessary. Avoid whole wheat flour for your first loaves as it creates denser results that can discourage beginners.
Start Your Bread Baking Journey Today
You now have everything you need to start baking bread at home. Six proven recipes ranked from easiest to slightly more involved. Clear explanations of yeast, flour, and timing. Troubleshooting guidance for when things don’t go as planned. And the confidence that comes from knowing you don’t need fancy equipment or years of experience.
Here’s my advice for your first bake: start with the no-knead crusty bread or the Irish soda bread. Both are nearly impossible to mess up. Both deliver results that will make you proud. And both build the foundation for everything that comes next.
Once you’ve made those successfully, move on to the focaccia for same-day satisfaction or the dinner rolls to practice shaping. Save the classic sandwich bread for when you’re ready to learn traditional kneading.
The best bread recipes for beginners aren’t just about the bread. They’re about building confidence in the kitchen, understanding that time and patience are ingredients too, and discovering that homemade bread is genuinely achievable for anyone.
In 2026, there’s something deeply satisfying about pulling a golden loaf from your own oven. The smell fills your home. The taste beats anything from a plastic bag. And the pride of knowing you made it yourself? That never gets old.
So choose your recipe, gather your ingredients, and start baking. Your first perfect loaf is waiting.