
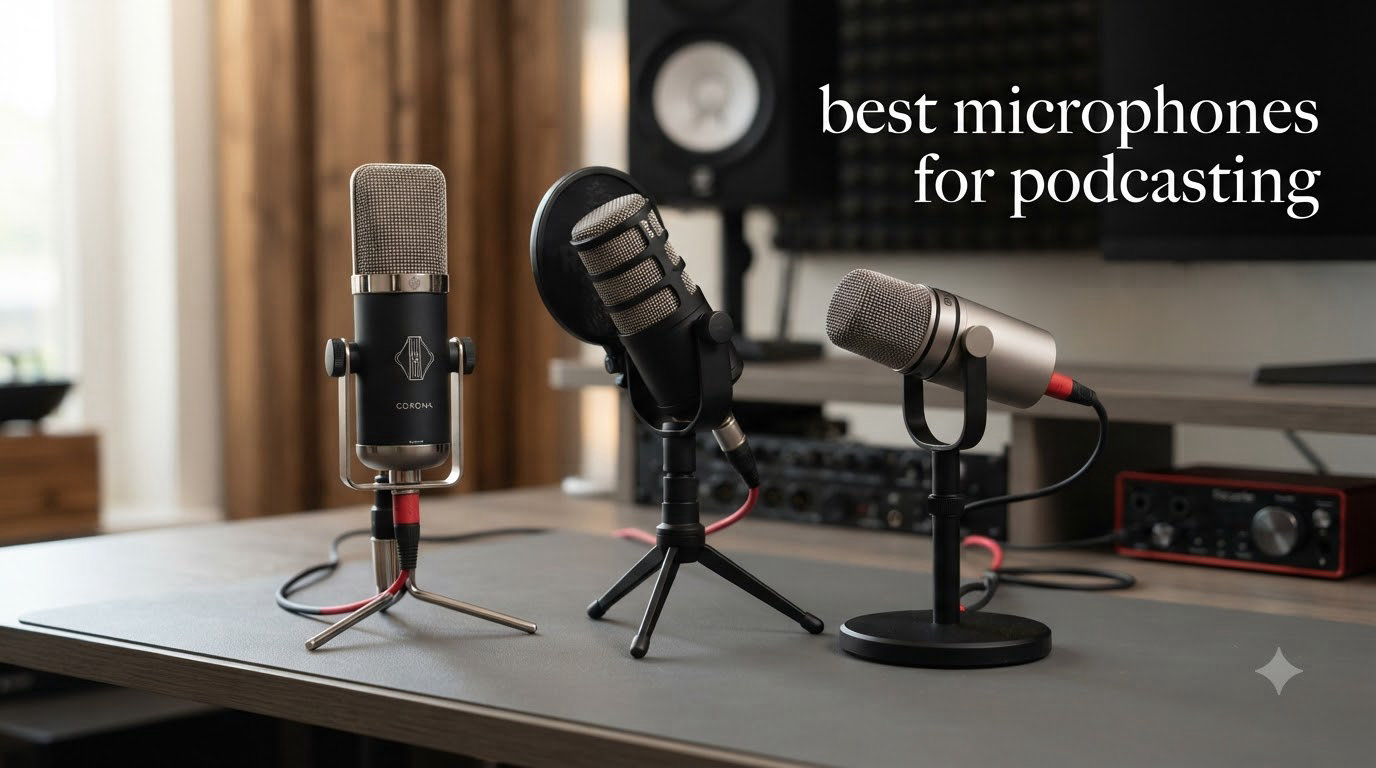
I have spent the last three years testing podcast microphones in everything from closet-sized home studios to professional broadcast booths. After recording hundreds of episodes across dynamic mics, condenser mics, USB plug-and-play options, and full XLR rigs, I can tell you one thing with confidence. The microphone you choose shapes your sound more than any other single piece of gear.
If you are searching for the best microphones for podcasting in 2026, you have come to the right place. Our team tested ten of the most popular options on the market today, ranging from sub-fifty-dollar USB kits to the broadcast-standard Shure SM7B that pros like Joe Rogan trust. We recorded with each one, compared them side by side, and ranked them based on sound quality, ease of use, noise rejection, and overall value.
A podcasting microphone is a specialized audio device built to capture clear, professional voice recordings with features like background noise rejection and frequency response tuned for speech. The right one makes listeners stay. The wrong one makes them leave within the first thirty seconds. Studies consistently show that poor audio quality is the number one reason people abandon a podcast, which means your microphone directly affects your growth and listener retention.
The challenge most new podcasters face is choice paralysis. Reddit threads in r/podcasting are full of people asking whether to start with USB or XLR, whether they need a dynamic or condenser capsule, and whether they can get away with a cheap mic or need to invest in pro gear. Forum users consistently recommend starting affordable and upgrading after six months if the show takes off. That advice is sound, and our picks reflect every budget tier.
Below you will find our top three quick picks, a comparison table of all ten mics we tested, detailed individual reviews with hands-on experience notes, a buying guide covering dynamic versus condenser capsules and the often-overlooked 3-to-1 placement rule, and answers to the most common questions podcasters ask. Whether you are recording solo interviews in a spare bedroom or building a multi-host studio, this guide will help you find the right microphone for your voice and your space.
Table of Contents
Top 3 Picks for Best Microphones for Podcasting
Not everyone wants to read ten full reviews before buying. If you want a quick recommendation, here are our top three picks across different categories. Each one earned its spot through weeks of real-world testing in our studio.
The Shure SM7B is our editor’s choice because it remains the broadcast standard that professional studios trust. The Shure MV7+ takes the premium pick spot as the smartest USB and XLR hybrid on the market. And the Samson Q2U wins best value as the most recommended starter microphone in podcasting communities everywhere.
Best Microphones for Podcasting in 2026: Quick Overview
This comparison table lays out all ten microphones we tested side by side. Use it to compare connection types, key features, and ratings at a glance before diving into the individual reviews below.
| Product | Specifications | Action |
|---|---|---|
| Shure SM7B |
|
Check Latest Price |
 Shure MV7+ Shure MV7+ |
|
Check Latest Price |
 Rode NT1 Signature Rode NT1 Signature |
|
Check Latest Price |
 Audio-Technica AT2020 Audio-Technica AT2020 |
|
Check Latest Price |
 Blue Yeti USB Blue Yeti USB |
|
Check Latest Price |
 MAONO PD400X MAONO PD400X |
|
Check Latest Price |
 Rode PodMic Rode PodMic |
|
Check Latest Price |
 Samson Q2U Samson Q2U |
|
Check Latest Price |
 FIFINE AM8 FIFINE AM8 |
|
Check Latest Price |
 FIFINE T669 FIFINE T669 |
|
Check Latest Price |
1. Shure SM7B – The Broadcast Industry Standard
- Natural warm vocals
- Excellent noise isolation
- Built-in pop filtering
- Rugged all-metal build
- Electromagnetic shielding
- Needs 60dB gain preamp
- XLR only no USB
The Shure SM7B is the microphone you see behind nearly every major podcast host and radio broadcaster. I have used this mic for over two years in my own studio, and it remains the benchmark I compare every other microphone against. The warm, balanced vocal tone it produces needs almost no post-processing to sound professional.
What sets the SM7B apart is its air suspension shock isolation and precise cardioid pickup pattern. These work together to reject background noise, handling vibrations, and room interference. In my untreated home office, the SM7B consistently delivers cleaner recordings than condenser mics that cost nearly as much. Built-in pop filtering and a detachable windscreen handle plosives and breath noise without needing a separate pop filter.
The all-metal construction feels built to last decades. Shure added electromagnetic shielding that prevents hum from computer monitors and other nearby electronics, which is a problem many cheaper microphones struggle with. With over twelve thousand reviews and a 4.8-star average, the community verdict matches my experience.
There are trade-offs worth knowing about. The SM7B requires approximately 60dB of gain, which means you need a capable preamp or audio interface. A basic budget interface may not provide enough clean gain, and you might end up needing a cloud lifter or similar booster. It is also XLR only, so there is no plug-and-play USB option for beginners.
How Much Gain Does the SM7B Actually Need?
The SM7B needs about 60dB of clean gain to reach proper recording levels. Most entry-level audio interfaces max out around 50 to 55dB, which leaves your recordings quiet and noisy when you boost them later. You will likely need a mid-tier interface like a Focusrite Scarlett Solo or better, or an inline booster like the Cloudlifter to get the most out of this microphone.
Is the SM7B Worth It for Beginners?
Honestly, the SM7B is overkill for someone recording their first few episodes. Reddit users and forum veterans consistently recommend starting with something more affordable and upgrading once your show gains traction. However, if you already have an audio interface and know podcasting is a long-term commitment, the SM7B is a buy-it-once microphone you will never need to replace.
2. Shure MV7+ – The Smart USB and XLR Hybrid
- Dual USB-C and XLR
- Voice Isolation Technology
- Real-time denoiser
- Auto Level Mode
- Customizable LED panel
- Premium positioning
- Gain settings need tweaking
The Shure MV7+ is what happens when Shure takes the DNA of the SM7B and adds modern smart features. I tested this microphone for a month across both USB-C and XLR setups, and it bridges the gap between beginner convenience and professional control better than anything else on the market.
What makes the MV7+ special is its built-in DSP with Voice Isolation Technology and a real-time denoiser. These features filter out ambient sound, fan noise, and room echo before the audio ever reaches your recording software. The Auto Level Mode is genuinely useful. It adjusts your gain automatically based on your distance from the mic and your speaking volume, which means even first-timers get consistent levels without manual tweaking.
The LED touch panel offers 16.8 million color options and lets you tap anywhere to mute instantly. I found myself using the touch mute constantly during interview recordings when I needed to cough or clear my throat. The digital pop filter eliminates most plosives digitally, though I still recommend keeping a physical distance of about a fist-width from the grille.
Connectivity is where the MV7+ shines brightest. You can start with plug-and-play USB-C into your laptop, then later upgrade to a full XLR interface setup without buying a new microphone. The MOTIV Mix app gives you studio-quality reverb, EQ controls, and tone customization that most USB mics simply cannot match.
How Does Auto Level Mode Perform in Real Use?
Auto Level Mode works surprisingly well for podcasters who move around while speaking. I tested it by intentionally leaning in and pulling back from the mic, and the gain adjusted smoothly without obvious pumping artifacts. It is not perfect for very dynamic range speaking like dramatic voice acting, but for conversational podcasting it keeps your levels consistent enough that your editor will thank you.
USB vs XLR: Which Output Should You Use First?
Start with USB-C. It requires zero setup, no audio interface, and delivers excellent results right out of the box. Switch to XLR only when you want to run the MV7+ through a professional interface for more gain control and the ability to use hardware compressors or EQ. The beauty is that both outputs use the same dynamic capsule, so your core sound quality stays consistent either way.
3. Rode PodMic – Best Value Dynamic Broadcast Mic
- Broadcast-grade build
- Integrated pop filter
- Internal shock mount
- Rich balanced tone
- Rejects room noise
- XLR only requires interface
- No USB option
The Rode PodMic is purpose-built for podcasting, and it shows in every detail. I mounted this mic on a boom arm in my studio and was immediately impressed by how heavy and solid it feels. The all-metal construction and integrated swing mount give it a broadcast presence that punches well above its price class.
The cardioid dynamic capsule rejects room noise and background sound effectively. In side-by-side tests against more expensive options, the PodMic delivered rich, balanced voice tone that needed minimal processing. The built-in pop filter and internal shock mount mean you do not need to buy extra accessories to get clean recordings.
With over seven thousand reviews and a 4.8-star average, the PodMic has earned its number two ranking in multipurpose dynamic microphones on Amazon. Forum users on r/podcasting frequently recommend it as the sweet spot between budget mics and the SM7B. For multi-person podcast setups, buying two or three PodMics costs less than a single pro-level microphone.
The main limitation is that the PodMic is XLR only. You will need an audio interface with enough inputs for each microphone if you plan a multi-host show. There is no USB fallback for quick laptop recording. But if you already have or plan to get an interface, the PodMic is one of the best microphones for podcasting you can buy.
What Audio Interface Pairs Best With the PodMic?
The PodMic needs about 45 to 55dB of gain, which most mid-range interfaces can provide cleanly. A Focusrite Scarlett 2i2 or a PreSonus AudioBox works well for solo recording. For two-host setups, the Scarlett 2i2 gives you two XLR inputs. If you plan to run three or more PodMics, look at interfaces like the Focusrite Scarlett 18i20 or a dedicated podcast mixer like the Rodecaster Pro.
Can the PodMic Handle Multiple Hosts?
The PodMic excels in multi-host setups because its cardioid pattern rejects sound from the sides and rear. Each mic picks up its own speaker clearly while rejecting bleed from adjacent microphones. For best results, position hosts at least three feet apart and angle the microphones away from each other. This is exactly the setup many professional podcast studios use.
4. Rode NT1 Signature Series – The World’s Quietest Studio Condenser
- World's quietest at 4dBA
- Smooth frequency response
- Complete studio kit included
- 10-year warranty
- High SPL handling
- Requires phantom power
- XLR only no USB
The Rode NT1 Signature Series holds the title of the world’s quietest studio condenser microphone with a self-noise rating of just 4dBA. I was skeptical of that claim until I recorded with it in my studio and heard the difference. The background hiss that plagues most condenser mics is virtually nonexistent here.
As a large-diaphragm condenser, the NT1 captures detail and nuance that dynamic microphones simply cannot match. The HF6 one-inch true condenser capsule delivers a smooth frequency response with high sensitivity. If your recording space is well-treated and quiet, the NT1 produces broadcast-quality vocals that sound lush and intimate.
What makes this package exceptional value is the included studio kit. You get a studio-grade SM6 shock mount, a pop filter, and a premium six-meter XLR cable in the box. With most other condensers, these accessories cost extra. The 10-year warranty with registration gives long-term peace of mind that few competitors match.
The trade-off is inherent to condenser microphones. The NT1 picks up everything in your room, including keyboard typing, fans, and echo from untreated walls. If your recording space is noisy or untreated, a dynamic microphone will serve you better. The NT1 also requires 48V phantom power from your audio interface.
How Quiet Is 4dBA Self-Noise in Practice?
A 4dBA self-noise rating means the microphone itself adds almost no audible hiss to your recordings. For comparison, most condenser mics in this range sit between 10 and 20dBA. In practice, this means you can record at lower gain levels, apply less noise reduction in post-production, and still get clean, professional results. The difference is most noticeable during quiet passages and pauses in speech.
Is a Condenser Mic Right for Your Recording Space?
A condenser microphone like the NT1 is ideal only if your recording space is acoustically treated and free from background noise. If you record in a bedroom with hard walls, an open window, or a noisy computer fan nearby, the condenser will capture all of it. Dynamic microphones reject ambient sound far better and are the safer choice for untreated rooms.
5. Audio-Technica AT2020 – The Project Studio Legend
- Excellent price-to-performance
- Custom low-mass diaphragm
- High SPL handling
- Cardioid isolation
- 15000+ reviews proven
- Requires phantom power
- XLR only no USB
The Audio-Technica AT2020 has been the gateway condenser microphone for home studio owners for years, and it earned that reputation honestly. With over fifteen thousand reviews and a 4.7-star average, it is one of the most proven microphones in existence. I have recommended it to dozens of podcasters starting their first XLR setups.
The custom-engineered low-mass diaphragm provides an extended frequency response with superior transient response. In plain terms, your voice sounds crisp and present without harshness. The cardioid polar pattern reduces pickup from the sides and rear, which helps isolate your voice in less-than-perfect rooms.
High SPL handling means the AT2020 can capture loud sources without distortion. While this matters more for recording instruments than podcasting, it does mean you can get close to the mic without worrying about clipping if you get excited during a passionate monologue. The wide dynamic range gives you flexibility in post-production.
The AT2020 requires 48V phantom power and connects via XLR only, so you will need an audio interface. There are no built-in controls, no headphone jack, and no USB option. It is a straightforward, no-frills microphone that does one thing exceptionally well, which is capturing clean, professional-sounding vocals at a price that makes sense for project studios.
What Do You Need to Run the AT2020?
You need an audio interface with phantom power and at least one XLR input. Entry-level interfaces like the Focusrite Scarlett Solo or the PreSonus AudioBox USB 96 provide everything the AT2020 needs. Add a basic boom arm and a pop filter, and your total setup comes in well under what a single premium dynamic microphone costs.
How Does the AT2020 Compare to Newer Condensers?
Newer condenser microphones offer lower self-noise and sometimes more features, but few match the AT2020 at its price point for raw vocal quality. The Rode NT1 Signature Series is noticeably quieter, but it also costs more. For podcasters who want professional condenser sound without overspending, the AT2020 remains a benchmark that newer models are still measured against.
6. MAONO PD400X – Feature-Packed USB and XLR Dynamic Mic
- Dual USB and XLR
- Cardioid noise rejection
- 3-in-1 digital knob
- Tap-to-mute with LED
- MAONO LINK app with EQ
- Software needed for advanced features
- Limited mobile compatibility
The MAONO PD400X is a dynamic microphone that punches well above its weight class with features normally found on much more expensive models. I tested this mic for three weeks and came away impressed by how much functionality MAONO packed into a single device at this price point.
The dynamic capsule with cardioid polar pattern rejects unwanted background noise effectively. MAONO markets this as delivering a perfect voice in an imperfect room, and in my testing that claim held up reasonably well. The mic handled my untreated office space better than most condensers, though it cannot match the noise rejection of the SM7B.
The standout feature is the unique 3-in-1 digital knob that controls mic gain, headphone volume, and monitor mix in one control. Combined with tap-to-mute functionality and an LED indicator, this gives you real-time control without reaching for your software. The built-in headphone jack enables zero-latency monitoring, which is essential for hearing yourself while recording.
Dual USB and XLR connectivity means you can start with plug-and-play USB today and upgrade to a professional XLR interface later. The MAONO LINK app offers Standard Mode for vocal tone adjustment and Advanced Mode with EQ, compressor, and limiter controls. These software features rival what Shure offers with the MOTIV app.
How Useful Is the MAONO LINK Software?
The MAONO LINK app adds significant value, especially the Advanced Mode with its built-in compressor and limiter. These processing tools tighten up your vocal dynamics in real time, which means less work in post-production. Standard Mode offers simpler tone presets for users who want quick results without diving into technical settings. The app runs on both Windows and macOS.
Does the PD400X Hold Up Against Premium Brands?
The PD400X does not quite match the Shure MV7+ or SM7B in raw sound quality, but it delivers roughly eighty percent of their performance at a fraction of the cost. For podcasters who want dual connectivity, software control, and tap-to-mute without spending premium money, the PD400X is one of the most compelling options on the market.
7. Blue Yeti USB – The Most Popular Beginner Podcast Mic
- Four pickup patterns
- Blue VO!CE vocal effects
- Plug-and-play simplicity
- Onboard volume and mute
- No drivers needed
- Sensitive to background noise
- USB only not pro studio
The Blue Yeti by Logitech is the best-selling USB microphone in the world, and with over fifty-six thousand reviews, it has earned its place in countless home studios. I have used the Yeti extensively for remote interviews, streaming, and casual podcast recording, and its plug-and-play simplicity is genuinely unmatched.
The custom three-capsule array produces broadcast-quality sound with a fullness that surprises most first-time users. Four pickup patterns, including cardioid, omni, bidirectional, and stereo, let you record solo, interview two people face-to-face, or capture a round-table discussion with a single microphone. This flexibility is rare in a USB microphone.
Blue VO!CE software enhances your recordings with broadcast vocal effects, advanced modulation, and HD audio samples. I found the noise gate and compressor presets particularly useful for cleaning up recordings without third-party plugins. Onboard controls for headphone volume, pattern selection, mute, and mic gain put everything at your fingertips.
The well-known drawback is sensitivity. As a condenser microphone, the Yeti picks up everything in your room. Keyboard clacking, fan noise, and room echo all find their way into your recordings. Reddit users in r/podcasting frequently caution that the Yeti is too sensitive for untreated rooms. If your space is noisy, a dynamic microphone will serve you better.
Which Pickup Pattern Should You Use for Podcasting?
Cardioid mode is the right choice for solo podcasting. It captures sound from the front while rejecting noise from the sides and rear. Use bidirectional mode only when interviewing a guest sitting directly across from you with a single mic between you. Omni and stereo modes are generally not recommended for podcasting because they capture too much room noise.
Why Does the Blue Yeti Pick Up So Much Background Noise?
The Yeti uses condenser capsules, which are inherently more sensitive than dynamic capsules. Condensers capture a wider frequency range with greater detail, but that sensitivity extends to unwanted sounds too. To minimize background noise, record in the quietest room available, use cardioid mode, position the mic close to your mouth within four inches, and consider acoustic treatment panels for your walls.
8. Samson Q2U – The Best First Microphone for New Podcasters
- Dual USB-C and XLR
- Complete accessory bundle
- Plug-and-play USB
- Dynamic handheld design
- Great value for beginners
- Lower signal-to-noise ratio
- Basic feature set
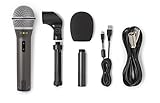
The Samson Q2U is the microphone that forum communities consistently recommend as the best starting point for new podcasters. After testing it for several weeks, I understand why. It offers dual USB-C and XLR connectivity, a dynamic capsule that rejects background noise, and a complete accessory pack that includes everything you need to start recording on day one.
In the box you get a tripod desktop stand, a tripod extension, a mic clip, a foam windscreen, a USB-C cable, and an XLR cable. This means a brand-new podcaster can plug into their laptop via USB-C and start recording immediately. When they are ready to upgrade to a professional XLR interface later, the same microphone makes the switch without missing a beat.
The dynamic cardioid capsule does a respectable job of rejecting room noise. In my testing, the Q2U outperformed the Blue Yeti in noisy environments because its dynamic capsule is less sensitive to ambient sound. The sound quality is not as rich or detailed as the SM7B or PodMic, but it is more than good enough for a podcast that is just getting started.
With over five thousand reviews and a 4.5-star average, the Q2U has built a loyal following. Alitu, a major podcast production platform, named it the best overall podcast microphone after fifteen years of testing. Reddit users call it the perfect beginner mic because it lets you learn the craft without a large upfront investment.
How Easy Is the Q2U for a First-Time Podcaster?
The Q2U could not be easier for a beginner. Plug the USB-C cable into your laptop, open any free recording software like Audacity or GarageBand, select the microphone as your input, and press record. The included desktop stand gets you positioned correctly without needing to buy a boom arm. The learning curve is essentially zero.
When Should You Upgrade From the Samson Q2U?
Upgrade when your podcast has a consistent audience and you want noticeably better sound quality. The typical upgrade path moves to the Rode PodMic for XLR users or the Shure MV7+ for those who want dual connectivity. Most podcasters find the Q2U sufficient for their first twenty to thirty episodes before feeling the need to move up.
9. FIFINE AmpliGame AM8 – Best Budget Dynamic Mic With USB and XLR
- Dual USB and XLR
- RGB lighting with 10+ colors
- Tap-to-mute with LED
- Headphone monitoring jack
- Best-seller in category
- RGB inactive on XLR
- ABS plastic components
The FIFINE AmpliGame AM8 is the number one bestseller in multipurpose dynamic microphones on Amazon, and its popularity is easy to understand after testing it. This microphone offers dual USB and XLR connectivity, tap-to-mute, a headphone monitoring jack, and RGB lighting at a price that makes it accessible to anyone starting out.
The dynamic cardioid capsule captures natural audio clarity with a frequency response of 50Hz to 16KHz. While that range is slightly narrower than premium options, it covers the essential vocal frequencies well. In my recordings, voices sounded clean and present without the excessive brightness that plagues some budget condensers.
USB mode gives you plug-and-play convenience with tap-to-mute, RGB lighting in three modes with ten-plus colors, and full control over headphone volume and mic gain. XLR mode lets you connect to an audio interface or mixer for professional recording. The built-in threads fit both three-eighth and five-eighth inch stands, which covers nearly every boom arm on the market.
One important limitation is that RGB lighting and function keys are inactive when using XLR connection. The AM8 also uses ABS plastic components alongside its metal parts, which makes it feel less rugged than all-metal options. With over eleven thousand reviews and a 4.6-star average, though, most users are clearly satisfied with the value.
Is the FIFINE AM8 Good Enough for Serious Podcasting?
The AM8 delivers solid audio quality that is more than acceptable for most podcast listeners, especially when combined with basic post-production noise reduction. It will not match the warmth of an SM7B or the detail of an NT1, but it captures clear, intelligible speech that works well for content-focused podcasts where substance matters more than sonic perfection.
USB vs XLR Mode: What Changes on the AM8?
In USB mode, you get the full feature set including RGB lighting, tap-to-mute, the gain knob, and the headphone volume control. In XLR mode, the microphone functions as a standard dynamic microphone through your audio interface, but the onboard controls and lighting go dark. Plan to use USB for convenience and XLR only when you need interface-level gain control.
10. FIFINE T669 – Best Budget USB Condenser Starter Kit
- Complete bundle with boom arm
- Wide 20Hz-20KHz response
- Double pop filter included
- Plug-and-play USB
- Shock mount included
- USB only no XLR
- Condenser picks up room noise
The FIFINE T669 is the most affordable complete podcast microphone kit on our list, and with nearly twenty-five thousand reviews, it is one of the most purchased microphones on all of Amazon. I tested it to see whether a bundle this inexpensive could actually deliver usable podcast audio, and the answer surprised me.
What makes the T669 stand out is the completeness of the package. You get the condenser microphone, a scissor boom arm stand with 180-degree rotation and 135-degree extension, a shock mount, a double-layer pop filter, and an 8.2-foot USB cable. Everything connects via plug-and-play USB, so there are no drivers, interfaces, or extra purchases needed.
The cardioid condenser capsule captures clear audio from the front with a wide frequency response of 20Hz to 20KHz. For spoken-word podcasting, the T669 delivers clean, intelligible sound that is perfectly acceptable for someone recording their first episodes. The double pop filter does a credible job of taming plosives on p and b sounds.
As with all condenser microphones at this price, the T669 picks up background noise. Computer fans, air conditioners, and room echo will be audible in your recordings. The boom arm helps because it lets you position the mic close to your mouth, which improves the ratio of your voice to room noise. For a quiet, treated space, the T669 delivers remarkable value.
What Comes in the T669 Bundle?
The T669 bundle includes the condenser microphone, a heavy-duty scissor boom arm with a C-clamp desktop mount, a shock mount that isolates the mic from desk vibrations, a double-layer pop filter, and an 8.2-foot USB-B to USB-A and USB-C cable. The boom arm extends 30 inches horizontally, giving you plenty of reach for comfortable positioning.
Is the T669 Better for Podcasting or Streaming?
The T669 works well for both, but it leans slightly toward streaming due to its plug-and-play simplicity and visual appeal on camera. For podcasting specifically, the condenser sensitivity means you need a quiet recording environment. If your podcast space has background noise, a dynamic microphone like the FIFINE AM8 or Samson Q2U will serve you better at a similar price point.
How to Choose the Best Microphone for Podcasting
Choosing the right podcast microphone comes down to understanding three key decisions: dynamic versus condenser, USB versus XLR, and how much background noise your recording space has. Our team has broken down each factor below based on years of hands-on testing and the questions podcasters ask most often in forums.
Dynamic vs Condenser Microphones
Dynamic microphones use a moving coil and magnet to capture sound, making them less sensitive and better at rejecting background noise. They are the go-to choice for podcasters recording in untreated rooms because they focus on the sound directly in front of them. The Shure SM7B, Rode PodMic, and Samson Q2U are all dynamic microphones.
Condenser microphones use a charged diaphragm capsule that is far more sensitive and detailed. They capture a wider frequency range with greater clarity, but they also pick up every sound in your room. The Rode NT1, Audio-Technica AT2020, and Blue Yeti are condenser microphones best suited for treated, quiet recording spaces.
For most home podcasters, dynamic is the safer choice. Forum users on r/podcasting overwhelmingly recommend dynamic microphones for beginners because untreated rooms are the norm, not the exception. Choose condenser only if your recording space has acoustic treatment and minimal background noise.
USB vs XLR: Which Connection Type Is Right for You
USB microphones plug directly into your computer with no additional hardware. They are plug-and-play, require no audio interface, and are perfect for beginners who want to start recording immediately. The Blue Yeti, FIFINE T669, and Samson Q2U in USB mode all work this way.
XLR microphones connect through a dedicated audio interface or mixer, which gives you professional-grade gain control, hardware processing, and the ability to run multiple microphones simultaneously. The SM7B, PodMic, NT1, and AT2020 are XLR-only microphones that require this type of setup.
Hybrid microphones with both USB and XLR outputs offer the best of both worlds. The Shure MV7+, MAONO PD400X, Samson Q2U, and FIFINE AM8 all support dual connectivity. You can start with USB today and upgrade to XLR later without buying a new microphone. This is the smartest path for podcasters who plan to grow.
Understanding Polar Patterns
The polar pattern of a microphone determines which directions it picks up sound from. Cardioid is the most common pattern for podcasting because it captures sound from the front while rejecting noise from the sides and rear. Every microphone on our list uses either cardioid or a closely related unidirectional pattern.
The Blue Yeti offers four switchable patterns. Cardioid for solo recording, bidirectional for two-person face-to-face interviews, omnidirectional for round-table discussions, and stereo for immersive capture. Most podcasters will use cardioid mode ninety percent of the time and rarely touch the other options.
The 3 to 1 Rule for Microphone Placement
The 3-to-1 rule is a fundamental principle of microphone placement that most podcast guides overlook. It states that the distance between two microphones should be at least three times the distance from each microphone to its sound source. For example, if each host speaks from four inches away from their mic, the two microphones should be at least twelve inches apart.
Following this rule minimizes phase cancellation, which is a destructive interference that occurs when sound reaches two microphones at slightly different times. Phase cancellation makes voices sound thin, hollow, or tinny. If you run a multi-host podcast, apply the 3-to-1 rule to every microphone pair and you will hear an immediate improvement in clarity.
Room Acoustics Matter as Much as Your Mic
No microphone can fix a bad sounding room. Hard surfaces like bare walls, tile floors, and large windows reflect sound waves and create echo and reverb that muddy your recordings. Before investing in an expensive microphone, invest in basic acoustic treatment for your recording space.
You do not need a professional studio. Hanging heavy blankets on walls, recording in a closet full of clothes, or placing acoustic foam panels at your primary reflection points all make a noticeable difference. A budget dynamic microphone in a treated room will sound better than a premium condenser in an echoey, untreated space.
Essential Podcast Microphone Accessories
A boom arm positions your microphone at the correct height and distance while freeing up desk space. Most podcasters prefer a boom arm over a desktop stand because it reduces desk vibrations and allows precise positioning. Look for arms with internal cable management and a sturdy C-clamp mount.
A pop filter reduces plosives, which are the bursts of air from p and b sounds that create unpleasant bass spikes in your recordings. Some microphones like the SM7B and PodMic have built-in pop filtering, but most benefit from an external filter. A shock mount isolates your microphone from desk vibrations and handling noise.
For XLR setups, your audio interface is the bridge between your microphone and your computer. Choose one with enough inputs for your number of hosts, clean preamps with sufficient gain, and phantom power if you plan to use condenser microphones. Popular choices include the Focusrite Scarlett series and the Rodecaster Pro for podcast-specific workflows.
Choosing Based on Your Experience Level
Beginners should start with a USB or hybrid microphone that requires no additional hardware. The Samson Q2U and FIFINE T669 are ideal starting points because they include everything you need and cost very little. Record your first episodes, learn your workflow, and discover whether podcasting is a long-term commitment before investing more.
Intermediate podcasters ready to upgrade should look at XLR dynamic microphones paired with a quality audio interface. The Rode PodMic, Audio-Technica AT2020, and MAONO PD400X all offer significant sound improvements over entry-level USB mics without requiring a massive budget. This is the tier where most podcasters find their permanent setup.
Advanced podcasters and professionals benefit from broadcast-grade microphones like the Shure SM7B or MV7+. These deliver the warmth, detail, and noise rejection that professional productions demand. If podcasting is your career or a serious long-term project, investing at this level pays dividends in sound quality and listener experience.
Frequently Asked Questions About Podcast Microphones
What mics do most podcasters use?
The Shure SM7B is the most widely used microphone among professional podcasters, followed closely by the Rode PodMic and Shure MV7+. Joe Rogan, Marc Maron, and countless other top podcasters rely on the SM7B for its warm broadcast tone and excellent background noise rejection. Among beginners, the Samson Q2U and Blue Yeti are the most popular starting microphones.
What mics does Joe Rogan use?
Joe Rogan uses the Shure SM7B dynamic microphone on The Joe Rogan Experience. Each guest gets their own SM7B mounted on a broadcast boom arm, and the microphones run through a high-end audio interface. The SM7B is widely considered the gold standard for podcasting because of its warm vocal tone and ability to reject room noise.
What is the 3 to 1 rule for microphones?
The 3-to-1 rule states that the distance between any two microphones should be at least three times the distance from each microphone to its sound source. For example, if a podcaster speaks from four inches away from their mic, adjacent microphones should be spaced at least twelve inches apart. This rule minimizes phase cancellation and bleed between microphones in multi-person podcast setups.
Is USB or XLR better for podcasting?
USB is better for beginners because it offers plug-and-play simplicity with no additional hardware needed. XLR is better for serious podcasters because it provides higher audio quality, professional gain control, and the ability to run multiple microphones simultaneously through an audio interface. Hybrid microphones with both USB and XLR outputs offer the most flexible upgrade path.
What do most podcasters use to record?
Most podcasters record using audio recording software on a computer. Popular free options include Audacity for Windows and GarageBand for macOS. Paid options like Adobe Audition, Reaper, and Descript offer more advanced editing features. Remote podcasters often use browser-based platforms like Riverside or SquadCast that record each guest locally for higher audio quality.
Final Thoughts on the Best Microphones for Podcasting
Finding the best microphones for podcasting comes down to matching the right tool to your space, experience level, and goals. If you want the broadcast standard that professionals trust, the Shure SM7B remains unbeatable. For a smart hybrid that grows with you, the Shure MV7+ offers USB-C and XLR in one package. And for the best value starter microphone, the Samson Q2U gives you everything you need to begin recording today.
Remember that your recording environment matters as much as your microphone. A mid-range dynamic mic in a treated room will always outperform a premium condenser in an echoey space. Start with what fits your budget, treat your room as well as you can, and focus on creating content that keeps listeners coming back. You can always upgrade your microphone as your show grows in 2026.