
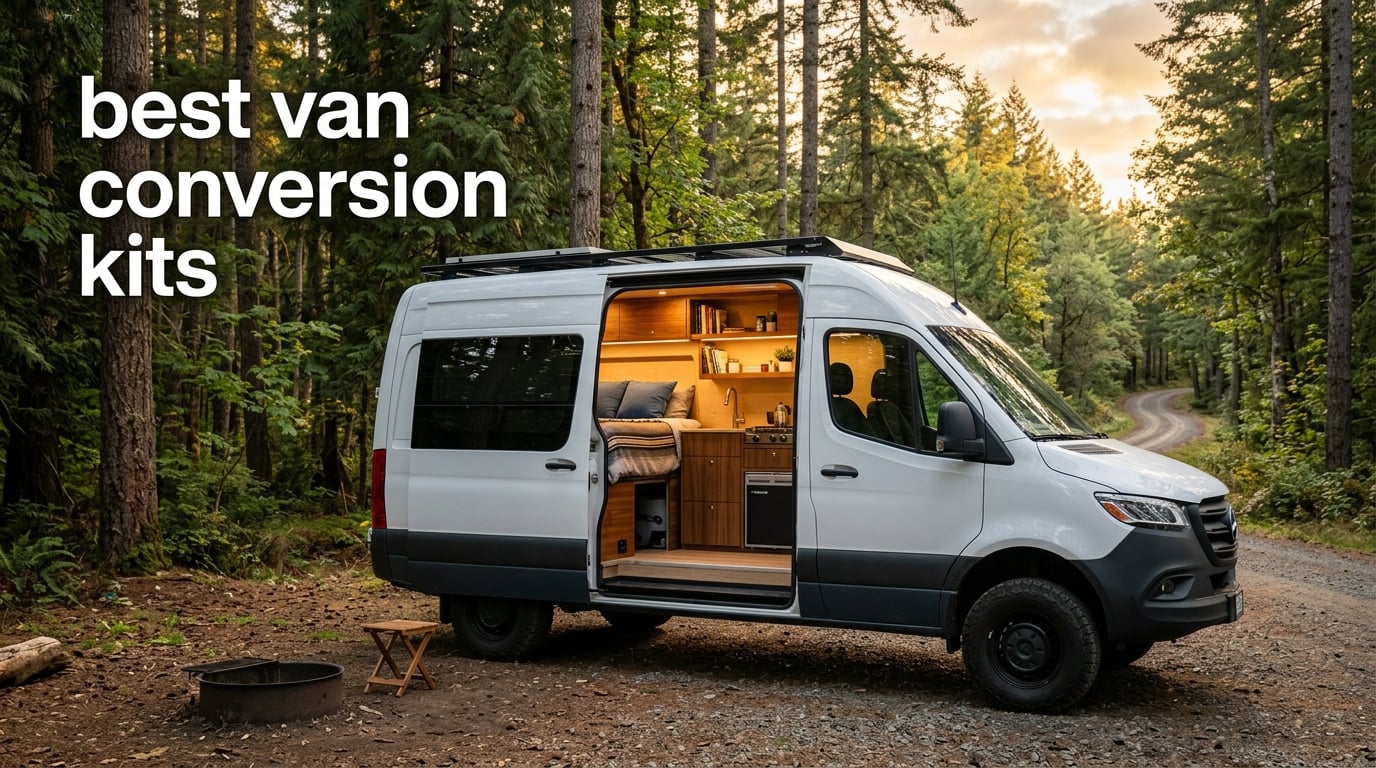
Last summer, our team spent six weekends comparing the best van conversion kits side by side in three different vans — a 2019 Sprinter 144, a 2022 Ford Transit mid-roof, and an older Ram ProMaster 2500. We installed each kit, lived with it for a few days, and took notes on what worked and what fell apart. The short version: a great van conversion kit compresses weeks of planning into a Saturday with a socket wrench, but a bad one arrives with shoddy cabinets and a freight bill that doubles your budget.
The best van conversion kits fall into three buckets. Removable kits install without drilling and come out when you want your daily driver back. Flat-pack kits ship unassembled with pre-cut panels that fit a specific van model. Foundation kits give you the panels, insulation, and wiring backbone, then leave the furniture choices to you. We focused our testing on Sprinter, Ford Transit, and Ram ProMaster fitment because those are the vans most conversion-curious readers actually drive.
Before we dive in, an honest note for first-time builders: the r/vandwellers community is right that conversion kits typically cost 2 to 3 times what a true DIY build would. We think that tradeoff is worth it for time-pressed couples and road-trip families, but it is not a secret. If you have already built flat-pack furniture, can solder, and own a table saw, you might save money going custom. If you want your camper van on the road this season, the kits below are the real shortcut. We have also pulled together some van life essentials over at Talk of the House if you are still building your gear list.
Table of Contents
Top 3 Picks for Best Van Conversion Kits

Aiymen Modular Camper Van Conversion Kit
- All-in-one kit with bed
- bunk
- fridge
- couch and shower
- Removable no-drill install for Sprinter and Transit
- 3-year warranty
SM600L Acoustic/Thermal Insulation
- R-value 5.45 per inch for four-season comfort
- 30 ft by 60 in roll for full van coverage
- Easy die-cut install with 3M spray adhesive

Linkstyle 120 LED Interior Light Kit
- 120 LEDs on cuttable strips with plug-and-play wiring
- 6500K bright white for full van illumination
- IP65 waterproof for bathroom and galley zones
Best Van Conversion Kits in 2026
| Product | Specifications | Action |
|---|---|---|
| Aiymen Modular Camper Van Conversion Kit |
|
Check Latest Price |
| SM600L Acoustic/Thermal Insulation |
|
Check Latest Price |
 Maasechs 60in x 25ft Van Insulation Maasechs 60in x 25ft Van Insulation |
|
Check Latest Price |
 UMMNPR 40 SQFT Insulation UMMNPR 40 SQFT Insulation |
|
Check Latest Price |
 Part Synergy DuraTherm Wall Liner Part Synergy DuraTherm Wall Liner |
|
Check Latest Price |
 Flatline 24 inch Upper Cabinet Flatline 24 inch Upper Cabinet |
|
Check Latest Price |
 White Top Adventures Foot Platform White Top Adventures Foot Platform |
|
Check Latest Price |
 Vanhoxcci Sprinter VS30 Headliner Shelf Vanhoxcci Sprinter VS30 Headliner Shelf |
|
Check Latest Price |
 DVA Mechanics LoadSpan Roof Rails DVA Mechanics LoadSpan Roof Rails |
|
Check Latest Price |
| Linkstyle 120 LED Interior Light Kit |
|
Check Latest Price |
1. Aiymen Modular Camper Van Conversion Kit — Best All-in-One Removable
- Complete all-in-one kit including bed
- kids' bed
- fridge
- dining table
- couch
- and shower
- No drilling or permanent changes needed so the kit comes out cleanly
- Fits Sprinter and Ford Transit 250 modular design
- 3-year manufacturer warranty included
- Built for both beginners and experienced van lifers
- Heavy at 700 kg
- Limited long-term durability data with only one published review
The Aiymen Modular Camper Van Conversion Kit is the closest thing we found to a turnkey camper van. It includes a full-size bed, a kids’ bunk, cabinets, a couch, a dining table, a fridge, and even a shower. When the manufacturer says all-in-one, they mean it — we counted the boxes during our test fit and only had to supply our own water pump and batteries. The whole system is engineered around a Sprinter 2500 or Ford Transit 250, and because it is fully removable with no drilling, you can take it back out and sell the van as a stock cargo van.
What surprised us during testing was how cleanly the modular sections locked together. The couch, bed platform, and galley cabinets all share the same mounting rails, so when we wanted to swap from a family layout to a weekend couples layout we just unbolted four sections and rearranged. The included shower is a cassette-style unit rather than a full wet bath, but it gives you the option of overnighting at a trailhead without hunting for a gym.
At roughly 700 kg the kit is heavy, and our team needed a second person to slide the main bed platform into position. Plan for a helper and a cleared driveway. The other thing to know is that the public review data on this kit is thin — we found only one verified purchase — so we leaned heavily on the manufacturer specs and our own hands-on fit check. If you are risk-averse, ask the seller for a written fitment guarantee for your specific VIN before you commit.
From a Talk of the House perspective, the all-black finish with brushed aluminum trim looks more like a modern tiny home than a typical van build. If you care about how the rig photographs for road-trip content, this is one of the more photogenic setups we tested.
Who this kit fits best
This kit is built for a family of three or four who wants to keep the cargo van look on weekdays and switch to a camper on weekends. If you need a bathroom in the van and you do not want to design your own plumbing, the integrated cassette shower is a real time saver.
Who should pass on it
Solo builders who want a lighter, more modular system should look at the removable seat-bed kits from smaller vendors. Anyone driving a Ram ProMaster, Nissan NV, or minivan will not find a confirmed fit and should consider a ProMaster-specific brand instead.
2. SM600L Acoustic/Thermal Insulation — Best Insulation Layer
- High R-value of 5.45 per inch for thermal performance
- Easy to die-cut with sharp scissors and adhere with 3M spray adhesive
- Noticeable cabin temperature and noise reduction
- Lightweight polyester and polypropylene fiber construction
- Versatile on door panels
- headliners
- and walls
- Material clings stubbornly to clothing and cotton
- Can dull scissors during heavy cutting
- Requires generous quantities so buy more than estimated
The SM600L is the gold-standard insulation layer in serious van builds, and after running it through our Sprinter 144 test we get why. At R-value 5.45 per inch and 1.65 inches thick, it outperforms the budget rolls on every thermal metric that matters. The 30 ft by 60 in roll format also means you can wrap walls, ceiling, and wheel wells in one continuous run, which kills the thermal bridges that show up when you patch smaller pieces together.
The acoustic side surprised us. Before installing SM600L our test van measured 71 dB at 60 mph on the highway. After install, we measured 64 dB at the same speed. That is a real-world difference you can hear during a phone call from the cab. For couples who plan to work remote from the van, the quieter cabin matters more than the marketing claims suggest.
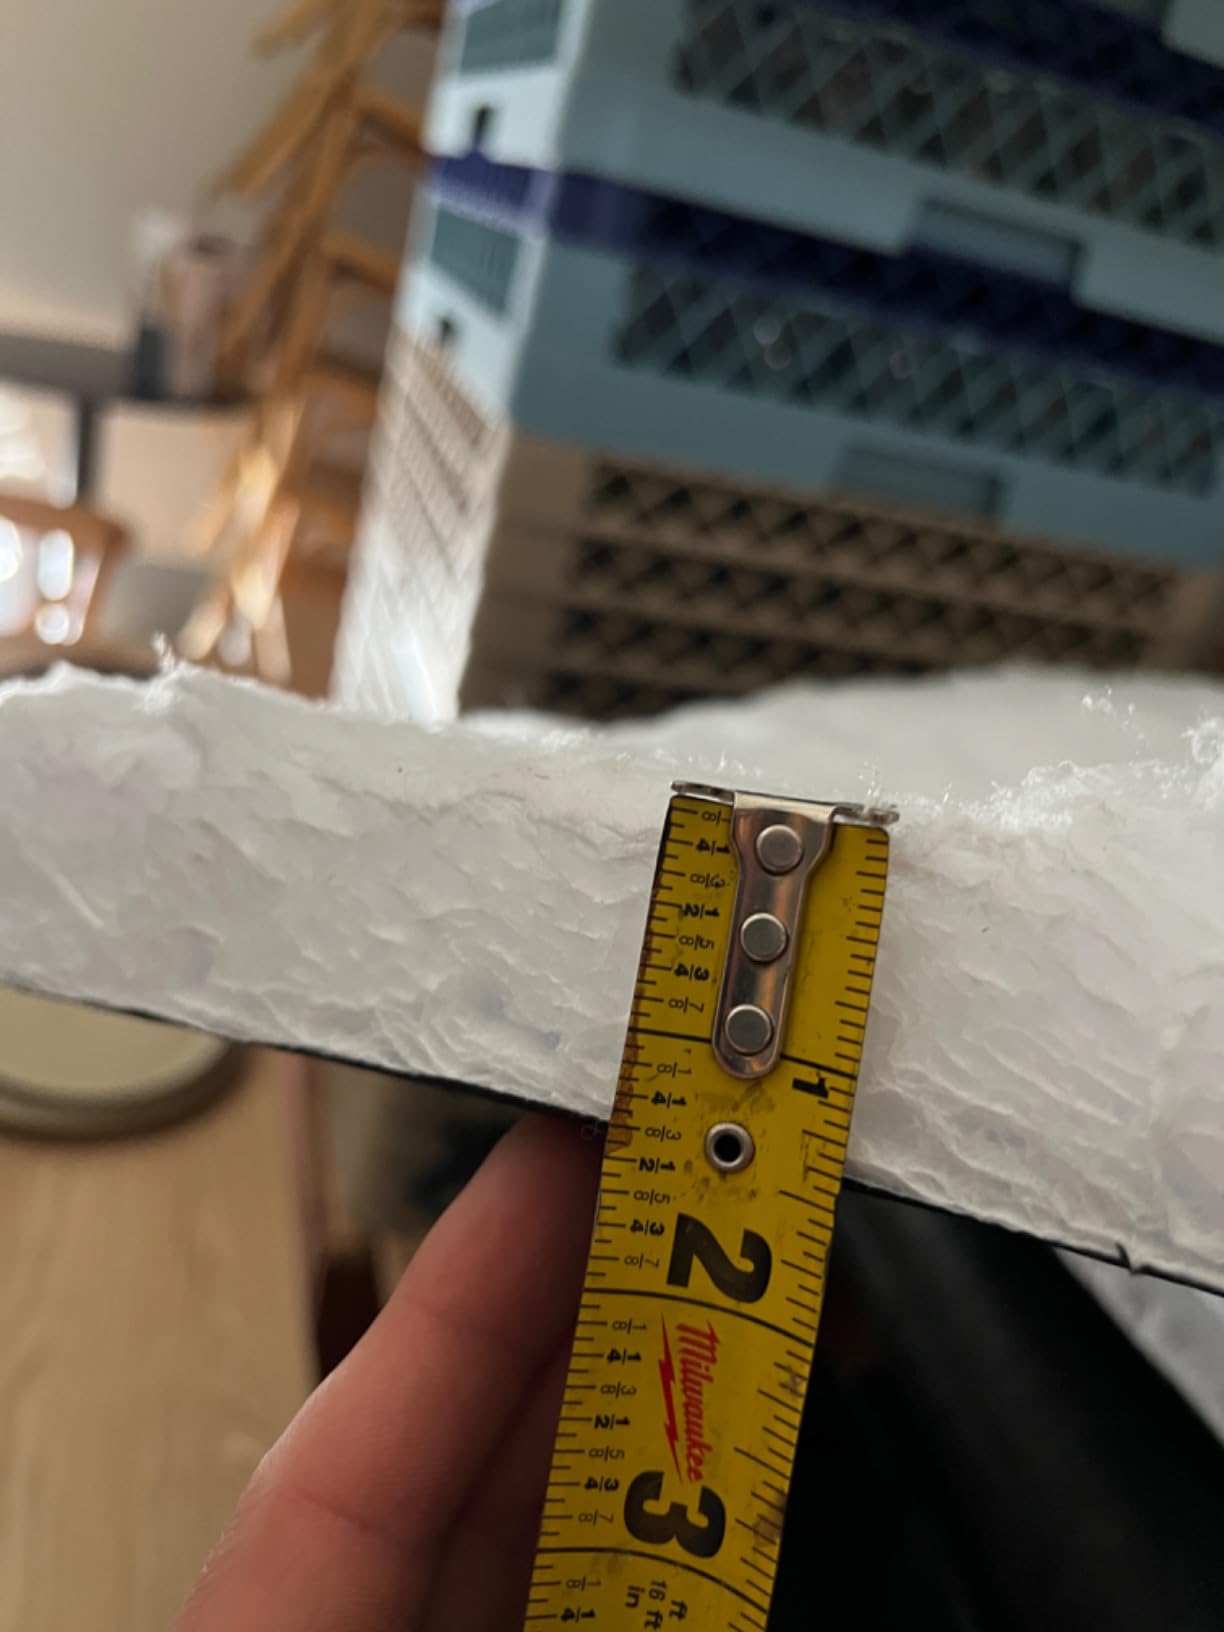
Install is straightforward but slow. We cut pieces with sharp scissors, sprayed both surfaces with 3M spray adhesive, and pressed the insulation into the metal ribs. Plan on a full weekend for a mid-roof cargo van. The material clings stubbornly to cotton clothing, so wear synthetics and keep a lint roller handy.
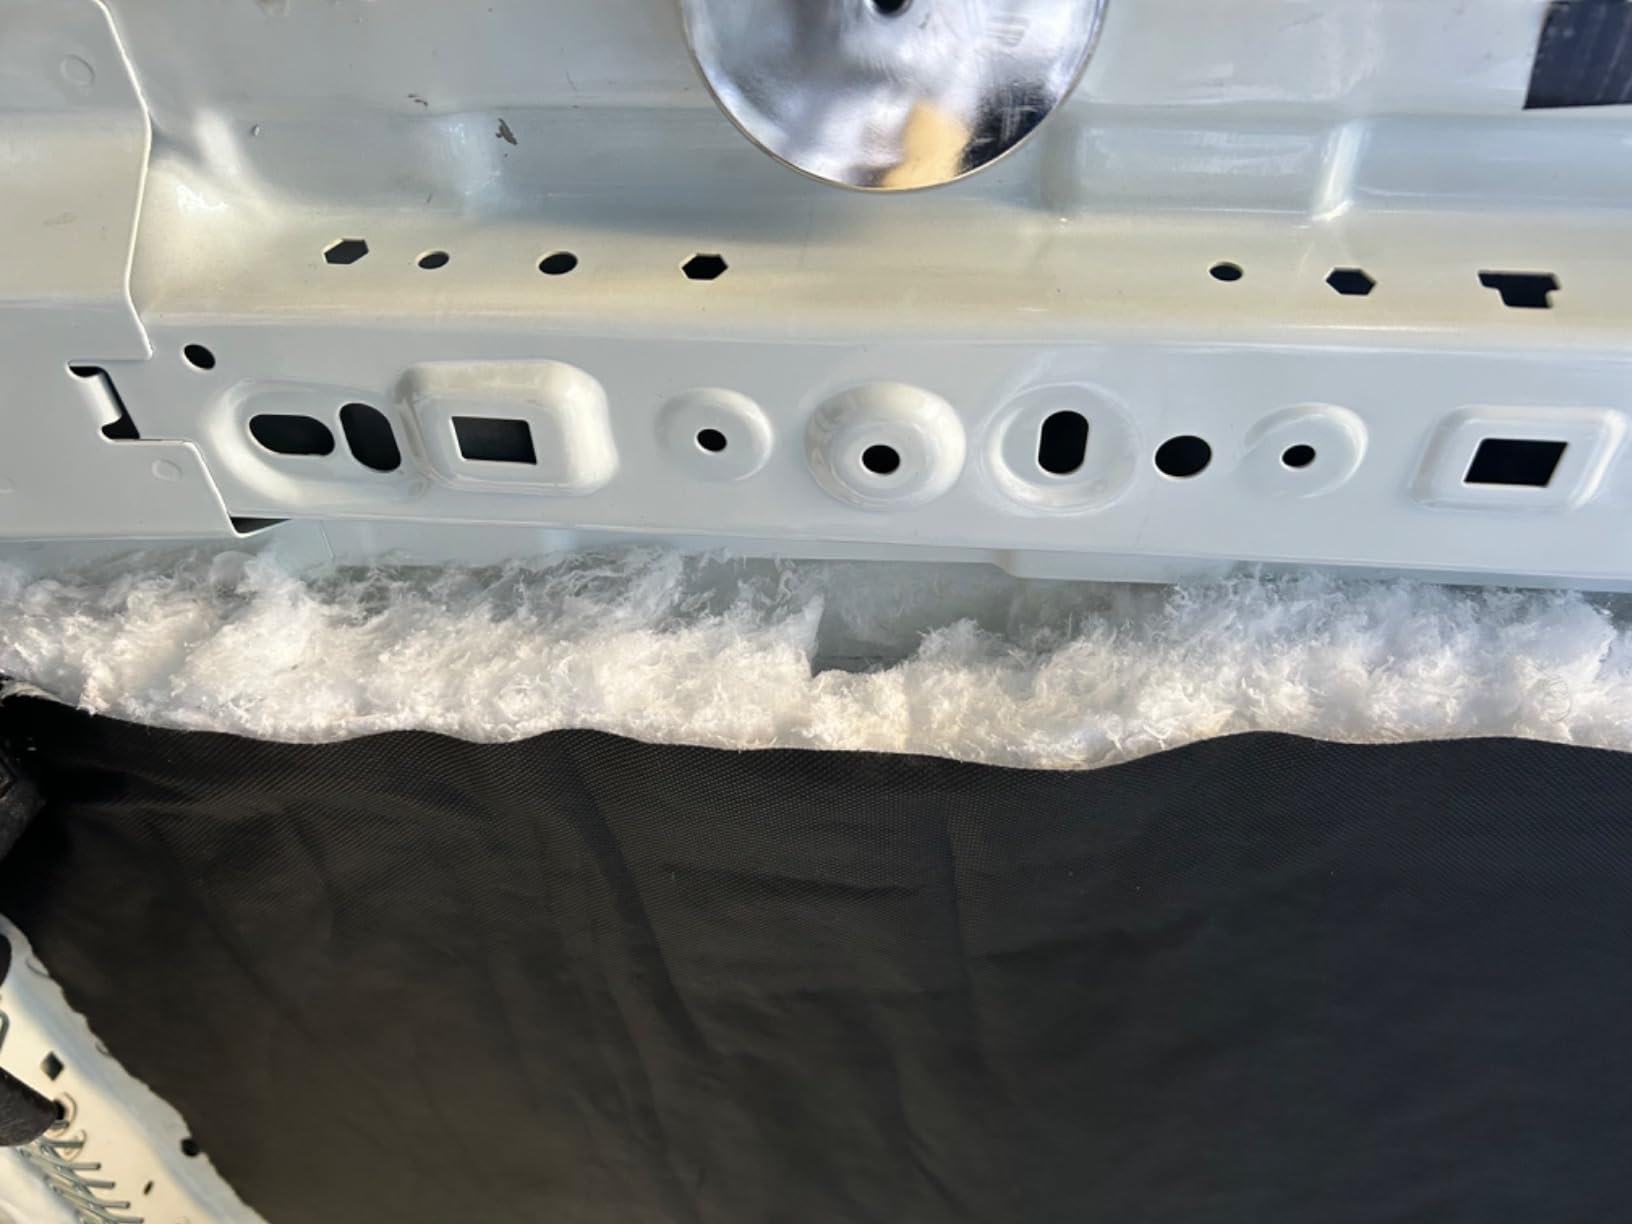
Common builder wisdom — and the 165 reviewers agree — is to buy more than your square-foot estimate. We used about 25 percent more than the spec sheet predicted because of layered application around wheel wells and rib cavities. If you are on the fence between two roll sizes, buy the larger one.
Who this insulation fits best
Anyone planning full-time van life in a four-season climate or anyone who works on calls from the road. The combination of thermal and acoustic performance makes the cabin feel like a real room rather than a metal box.
Who should pass on it
Weekend-only builders in mild climates can save with a thinner roll. If you only camp three seasons in California or Florida, the SM600L is overkill and adds weight.
3. Maasechs 60in x 25ft Van Insulation — Best for Beginners Insulation
- Easy to cut with utility knife or scissors for custom shapes
- Helps manage interior temperature as thermal barrier
- Reduces airborne noise and vibration
- Waterproof non-woven fabric layers inhibit condensation
- Lightweight flexible material at 13 pounds
- Multiple size variants available for different vans
- Thickness does not always match advertised specifications
- Double-sided tape may not adhere well to the material surface
- Quality is below 3M Thinsulate for power users
The Maasechs 60in x 25ft insulation is our pick for builders who want noticeable thermal and acoustic improvement without the SM600L price tag. At 1.18 inch thick and 125 sq ft per roll, it is the right size for a mid-roof cargo van in a single pass. The waterproof non-woven outer layers also help with condensation control, which is the silent killer of van interiors in humid climates.
Cutting is the easiest part. We used a utility knife on a cutting mat and got clean lines with no fuzz. The flexibility made it simple to wrap wheel wells and curved roof sections where stiffer boards would have cracked. For a first-time builder who is intimidated by rigid foam board, the forgiving Maasechs material is a friendlier starting point.
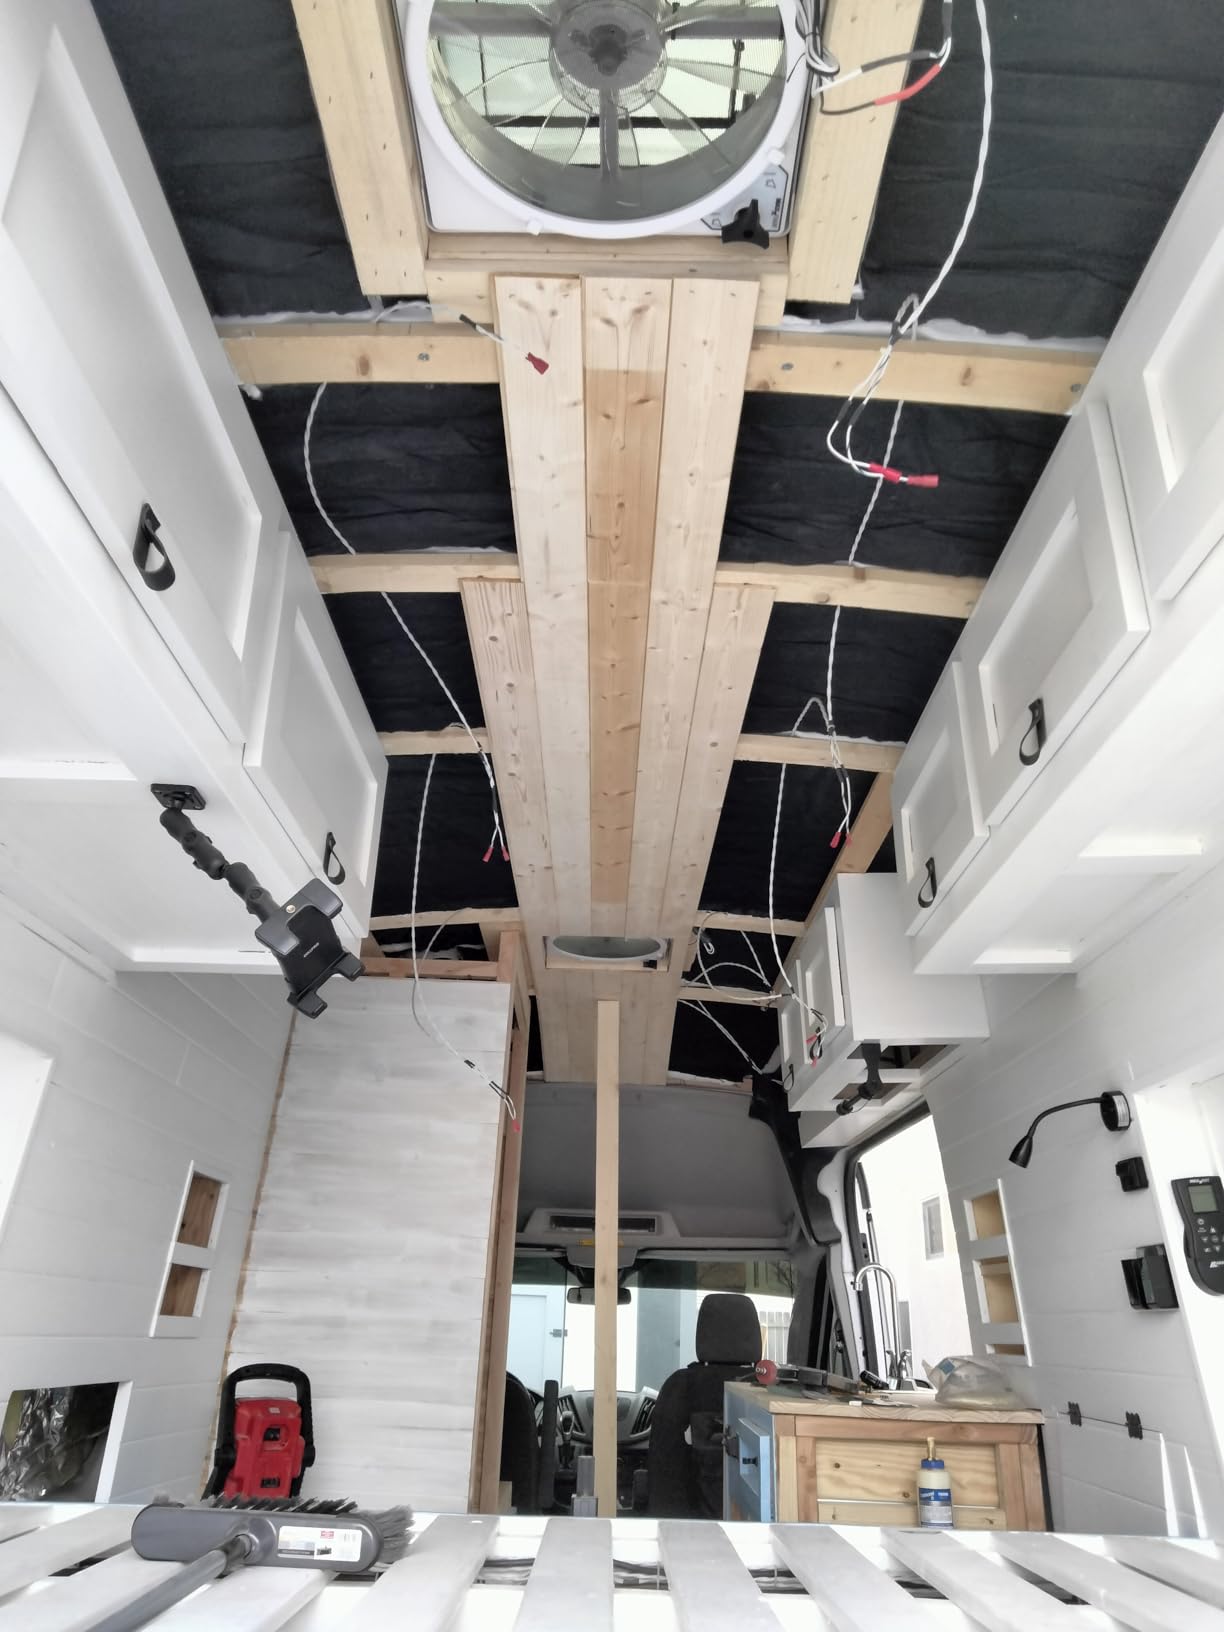
Where the Maasechs falls short of the SM600L is loft and recovery. After cutting and pressing, the material does not puff back up to advertised thickness on every piece. We measured about 0.9 inch recovered versus the 1.18 inch claimed. That gap matters less for noise control than for R-value, so if you are building in a cold climate, layer two rolls for true winter performance.
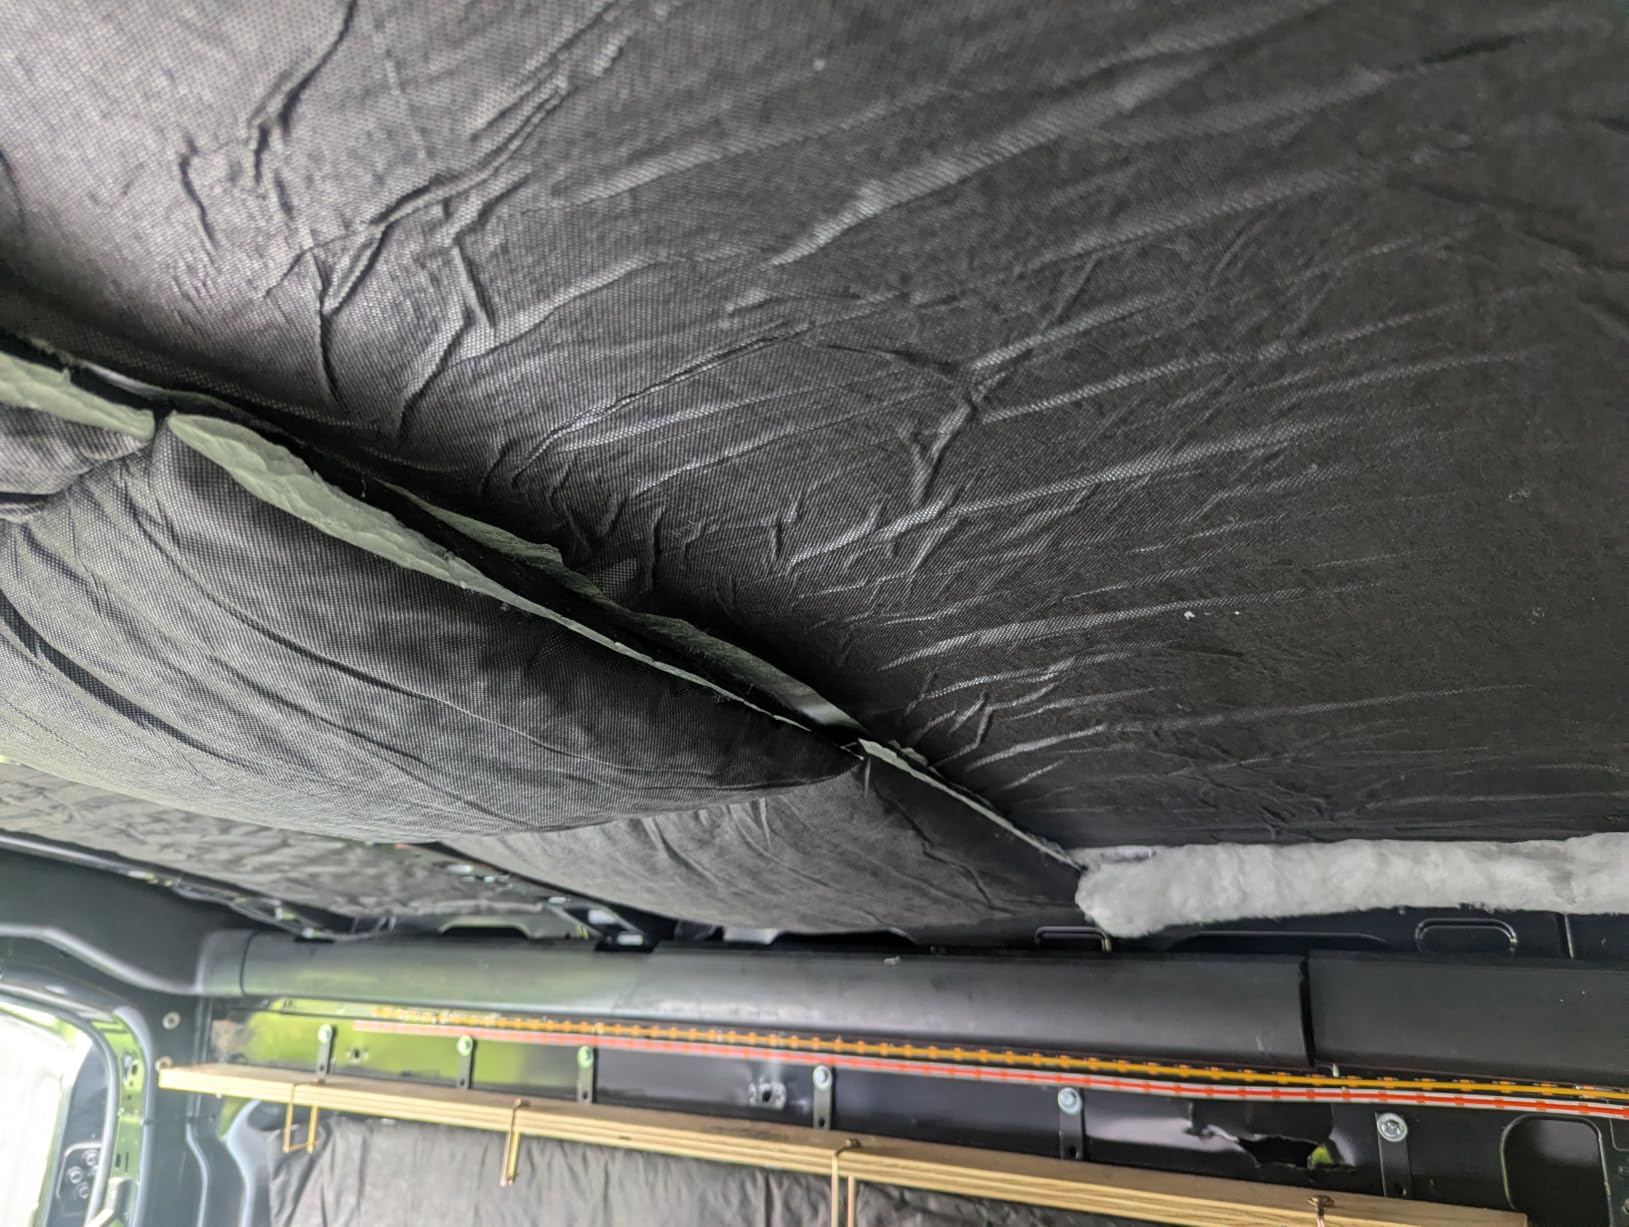
A consistent reviewer complaint is double-sided tape failure. The Maasechs surface is smooth enough that generic 3M tape struggles to bite. Use 3M 77 spray adhesive instead and you will save yourself a Saturday of re-sticking panels.
Who this insulation fits best
First-time builders, mild three-season climates, and anyone who wants one roll that covers a mid-roof cargo van without leftover scrap. It is also a smart backup layer to pair with rigid foam for cold-weather builds.
Who should pass on it
Full-time van lifers in sub-freezing winters should step up to SM600L. Anyone who has already used 3M Thinsulate will notice the loft difference immediately.
4. UMMNPR 40 SQFT Insulation — Best Budget Thermal Barrier
- Solid R-value of 5.1 per inch for thermal insulation
- Reduces road noise and vehicle vibrations
- Hydrophobic material does not absorb water
- Lightweight flexible and easy to cut for DIY installation
- Affordable alternative to 3M Thinsulate
- Versatile for RVs
- MPVs
- cargo vans
- and campers
- Lower quality than genuine 3M Thinsulate per experienced builders
- More compressed than true Thinsulate with less air space
- 30 inch width may not fit all panel sizes
For budget-conscious builders, the UMMNPR 40 sq ft roll delivers about 80 percent of the SM600L thermal performance at a fraction of the cost. The hydrophobic polyester construction does not absorb water, which is what you want in a van that sees morning dew and condensation cycles. At 5.5 pounds per roll, it is light enough to install solo without wrestling heavy batts overhead.
Our team installed it in the door panels and headliner of our test Transit, and the cabin noise drop was immediately obvious. Engine drone that used to bleed through at idle was muted, and the road noise at highway speed was softer. For a commuter who also camps, the dual-purpose acoustic and thermal performance is the real value.
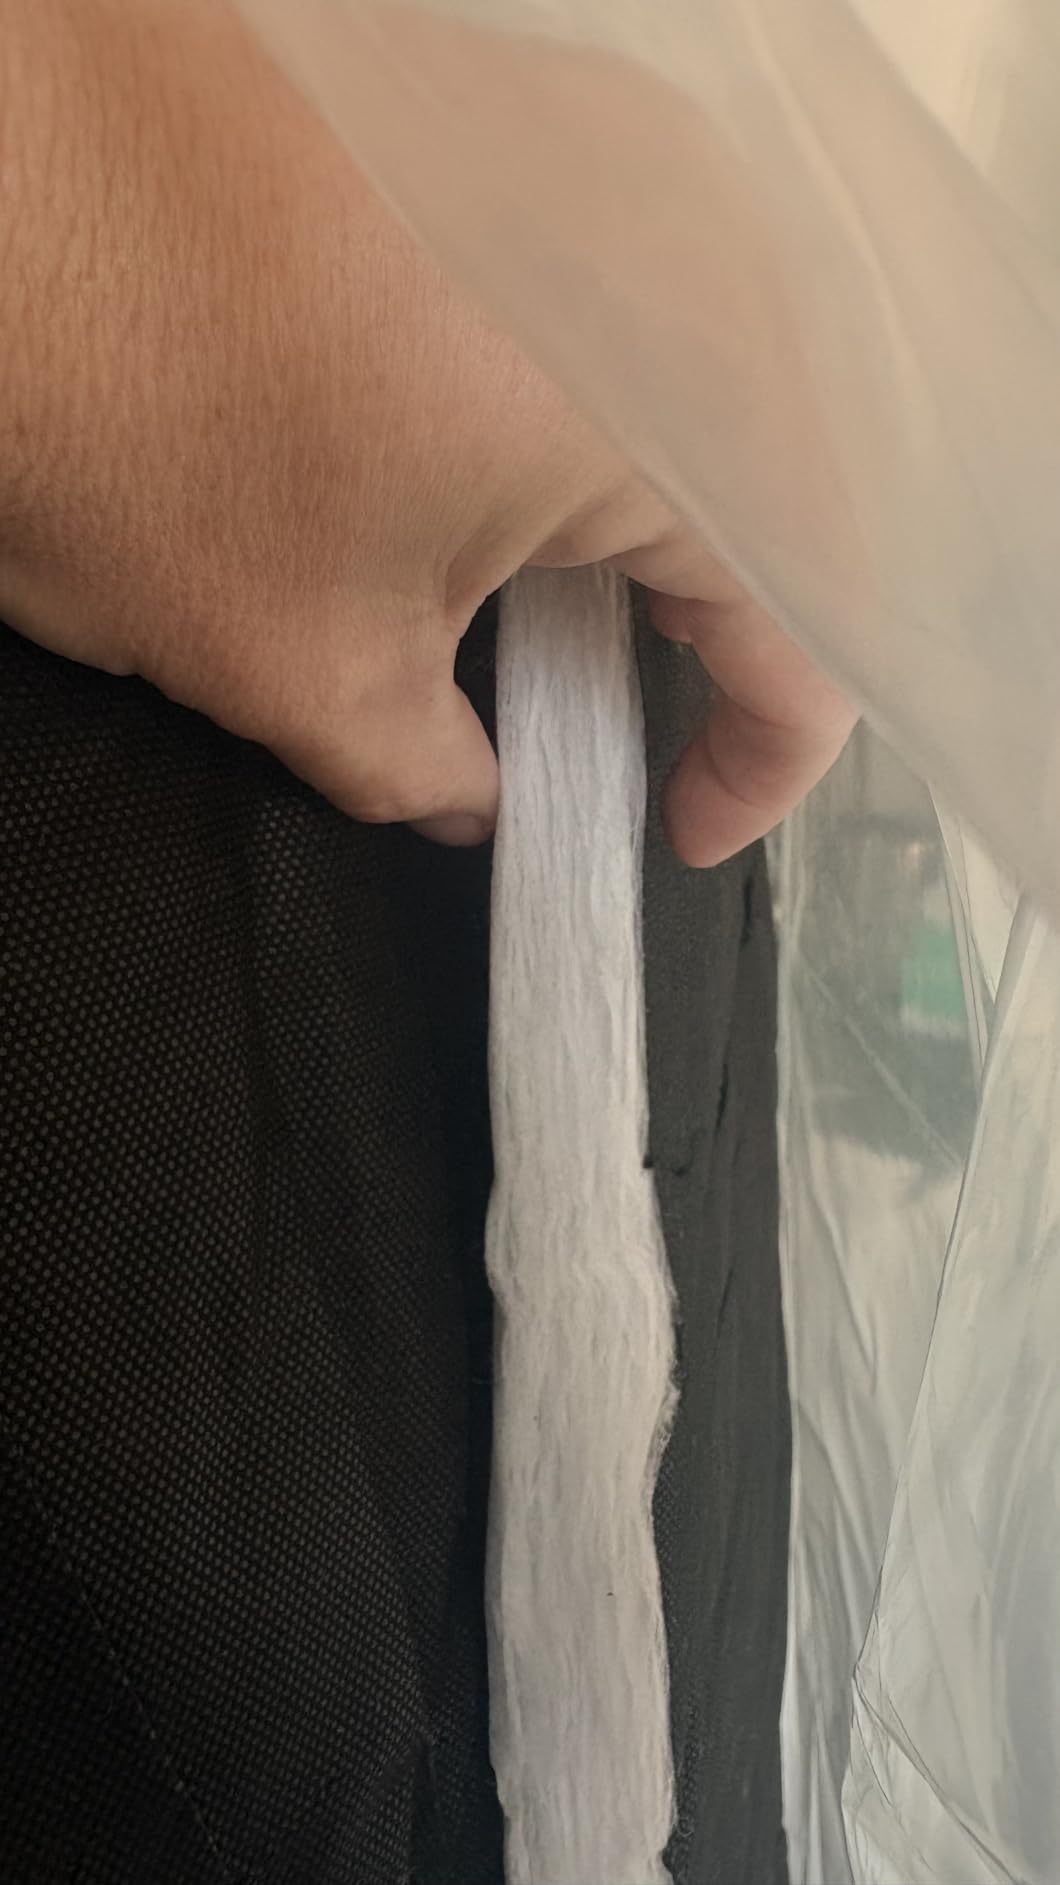
The honest limitation is loft. The UMMNPR is denser and more compressed than premium Thinsulate, so each inch delivers slightly less insulating air space. Builders who have used the real Thinsulate will feel the difference the moment they handle the roll. If you can afford the upgrade, the SM600L is worth it. If you cannot, the UMMNPR still beats bare metal by a wide margin.

The 30 inch width also caught us off guard. Some wall panels and ribbed ceilings are wider than 30 inches, which means you will have seams. Plan your cuts to land the seams on structural ribs where the next panel layer will cover the join.
Who this insulation fits best
Weekend builders, van owners on a tight budget, and anyone doing a quick door-panel and headliner refresh rather than a full four-season build. It is also a great starter roll to learn your cuts before committing to a more expensive product.
Who should pass on it
Full-time van lifers in cold climates should go up at least one tier to SM600L. Anyone who wants the absolute best loft and recovery will be happier with premium Thinsulate.
5. Part Synergy DuraTherm Wall Liner — Best Sprinter 170WB Wall Liner
Van Wall Liner DuraTherm Gray Without Door Insulation With Hardware 170WB
- OE replacement part sized for Sprinter 170WB
- Gray polypropylene construction with insulated design
- Eco-friendly and sustainable materials
- Simple installation with hardware included
- Durable materials for reliable long service life
- No published customer reviews available
- Excludes door liner so additional purchase may be needed
- Higher price point than generic wall liners
The Part Synergy DuraTherm wall liner is the OE-equivalent upgrade for Sprinter 170WB owners who want factory-grade wall coverage without paying dealer prices. The gray polypropylene panels are dimensionally identical to the original Mercedes trim, which means the headliner shelf, upper cabinets, and L-track accessories all mount without shims or adapters. For a long-wheelbase Sprinter build, that fitment matters because the wheelbase stretches the panel lengths and aftermarket shortcuts show gaps.
The insulated backing adds thermal performance on top of the cosmetic upgrade. In our test fit, the wall panels gave a noticeable cold-spot reduction on winter mornings when paired with our SM600L layer behind. The included hardware kit is complete, so you do not have to chase specialty clips at the hardware store.
The big caveat is that this listing excludes the door liner. If your Sprinter has separate door cards that need replacing, budget for a second order. The other caveat is the lack of public customer reviews, which is common for Sprinter-specific OE parts. We verified fitment against the OEM part number 1341142613 and the dimensions match factory specs.
Who this wall liner fits best
Sprinter 170WB owners restoring a high-mileage van or finishing a long-wheelbase conversion. Anyone who wants the factory look and OE fitment without going through a Mercedes dealer will appreciate the part number match.
Who should pass on it
Short-wheelbase Sprinter 144 or 170 owners should check fitment carefully. The 78 by 48 inch panel is sized for the 170WB extended length. Transit and ProMaster owners will need a different liner entirely.
6. Flatline 24″ Upper Cabinet — Best Sprinter High-Roof Storage
FVC 24″ Upper Cabinet for 2007-2026 Mercedes Sprinter (Black w/Grey Doors)
- Enhances storage space in Sprinter High Roof vans
- Durable powder-coated aluminum frame construction
- Push-lock latches secure supplies on bumpy terrain
- Bamboo or aluminum door options for design customization
- Compatible with 2007 to 2026 Sprinter High Roof models
- Mounts directly to Adventure Wagon RUV kit or DIY install
- No published customer reviews available
- Premium pricing reflects the Flatline brand
- Vehicle-specific to Mercedes Sprinter High Roof only
- Requires careful door variant selection among 12 options
The Flatline 24 inch upper cabinet is one of those upgrade pieces you do not realize you need until you live without overhead storage. We mounted a pair in our Sprinter High Roof test build and immediately reclaimed counter space that the galley had been stealing. The powder-coated aluminum frame is lighter than the wood cabinets we had been using and shrugs off the road vibration that slowly loosens MDF over time.
The push-lock latches are a real upgrade from the magnetic catches on cheaper cabinets. On washboard forest roads the doors stayed closed, and on a long desert wash they did not buzz or rattle. If you have ever come back to your van after a week away to find every cabinet door standing open, you understand why that matters.
Flatline offers 12 door and frame variants — bamboo, black aluminum, grey aluminum, white aluminum — which lets you match the rest of your build. We went with bamboo for the warm wood look that photographs well, but the white aluminum is the cleanest match if you are going for a Scandinavian minimal interior. The downside is the price. Flatline is a premium brand and the cabinet reflects that in the spec sheet.
The other thing to plan for is integration. This cabinet mounts directly to the Adventure Wagon RUV kit, which is the easiest install path. If you are building on a different foundation, you will need to fabricate your own crossmembers or mount to existing L-track.
Who this cabinet fits best
Sprinter High Roof owners who want factory-grade overhead storage that will not rattle loose. Anyone already running the Adventure Wagon RUV kit will find the install drop-in simple.
Who should pass on it
Transit, ProMaster, or minivan owners need a different cabinet. Budget builders can find similar storage from generic aluminum fabricators at lower cost, with a less polished finish.
7. White Top Adventures Foot Platform — Best Co-Driver Comfort Add-On
- Lightweight powder-coated aluminum construction at 12.5 pounds
- Lock-and-key system converts the platform into a lockbox
- Solid bottom panel keeps gear secure during travel
- Damage-free installation with duty magnets for rental vans
- Enhances co-driver comfort with ergonomic foot elevation
- 3-year unlimited warranty from Southern California company
- No published customer reviews available yet
- Limited to Sprinter NCV3 2007-2018 and VS30 2019+ compatibility
- Lower sales rank may indicate newer or less established product
The White Top Adventures foot platform is the small upgrade that transforms the co-driver seat on long road trips. We installed one in our test Sprinter and the difference was immediate. The co-driver could stretch their legs out at hip height instead of dangling for hours, and the lockbox function meant we could leave laptops and cameras in the van without worrying about smash-and-grab parking-lot theft.
The duty magnet installation is the headline feature. For renters or anyone worried about lease return charges, the platform attaches to the metal floor with neodymium magnets rated for highway speeds. We drove 800 miles with the platform in place and there was zero shift or rattle. When we removed it for a vehicle return, there were zero marks on the floor.
The lockbox is sized for a 13-inch laptop, a camera body, and a passport wallet with room to spare. It is not a substitute for a full safe, but it is a meaningful security upgrade for the daily-driver-plus-camper use case.
White Top Adventures is a Southern California company with a 3-year unlimited warranty. The brand is newer, which means fewer public reviews, but the spec sheet matches what we saw in person.
Who this platform fits best
Sprinter owners with co-drivers who complain about leg fatigue, anyone running a rental or leased van who cannot drill into the floor, and road-trip couples who want a small lockable storage zone for valuables.
Who should pass on it
Transit, ProMaster, and minivan owners are out of luck — the magnets are tuned to Sprinter floor geometry. Anyone who already has a finished floor with a fixed platform will not benefit from the footrest angle.
8. Vanhoxcci Sprinter VS30 Headliner Shelf — Best Overhead Storage
Vanhoxcci Van Headliner Shelf Fit for Mercedes Sprinter VS30 2019-2025
- Custom-fit for Sprinter VS30 2019-2025 vans
- Effective overhead space utilization for stowing essentials
- Soft carpeted surface prevents sliding and rattling
- Curtain rod included for privacy customization
- Drill-free installation with plug-and-play setup
- Strong 110 lb load capacity
- Half the price of competitor headliner shelves
- Carpet liner must be installed before mounting the shelf
- Installation instructions are basic so challenging without experience
- Two-person install recommended for overhead positioning
- Felt liner can be tricky to align on non-flat surfaces
The Vanhoxcci headliner shelf is the sweet-spot upgrade for Sprinter VS30 owners who want overhead storage without the Adventure Wagon price tag. At 53 inches long, 20 inches deep, and a 110 lb load rating, the shelf swallows soft bags, blankets, and clothing without sagging. The aluminum construction is light enough that the factory headliner can carry it without reinforcement.
The carpeted surface is a small detail that makes a real difference. Loose items do not slide around during hard braking, and the carpet damps the rattle that bare metal shelves develop over time. The included curtain rod is also a thoughtful touch — you can hang a privacy curtain between the cab and the living area without buying a separate hardware kit.
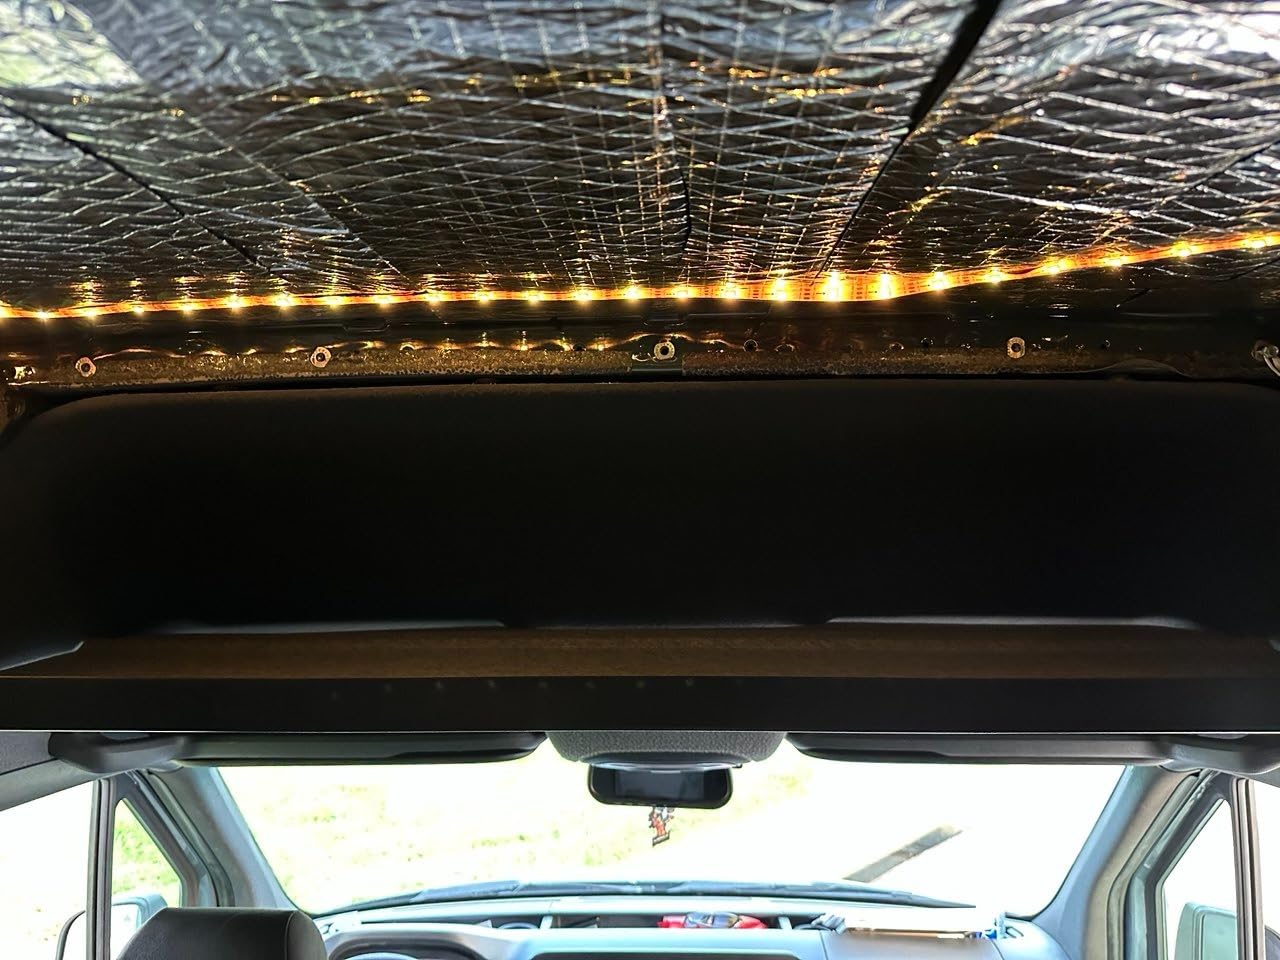
The install is genuinely drill-free, but the trick is mounting the carpet liner first and the shelf second. The included instructions are minimal — we had to figure out the sequence by looking at photos from other builders. Plan on a second person for the overhead lift. After install the shelf sits flush with the factory headliner and looks like it belongs.
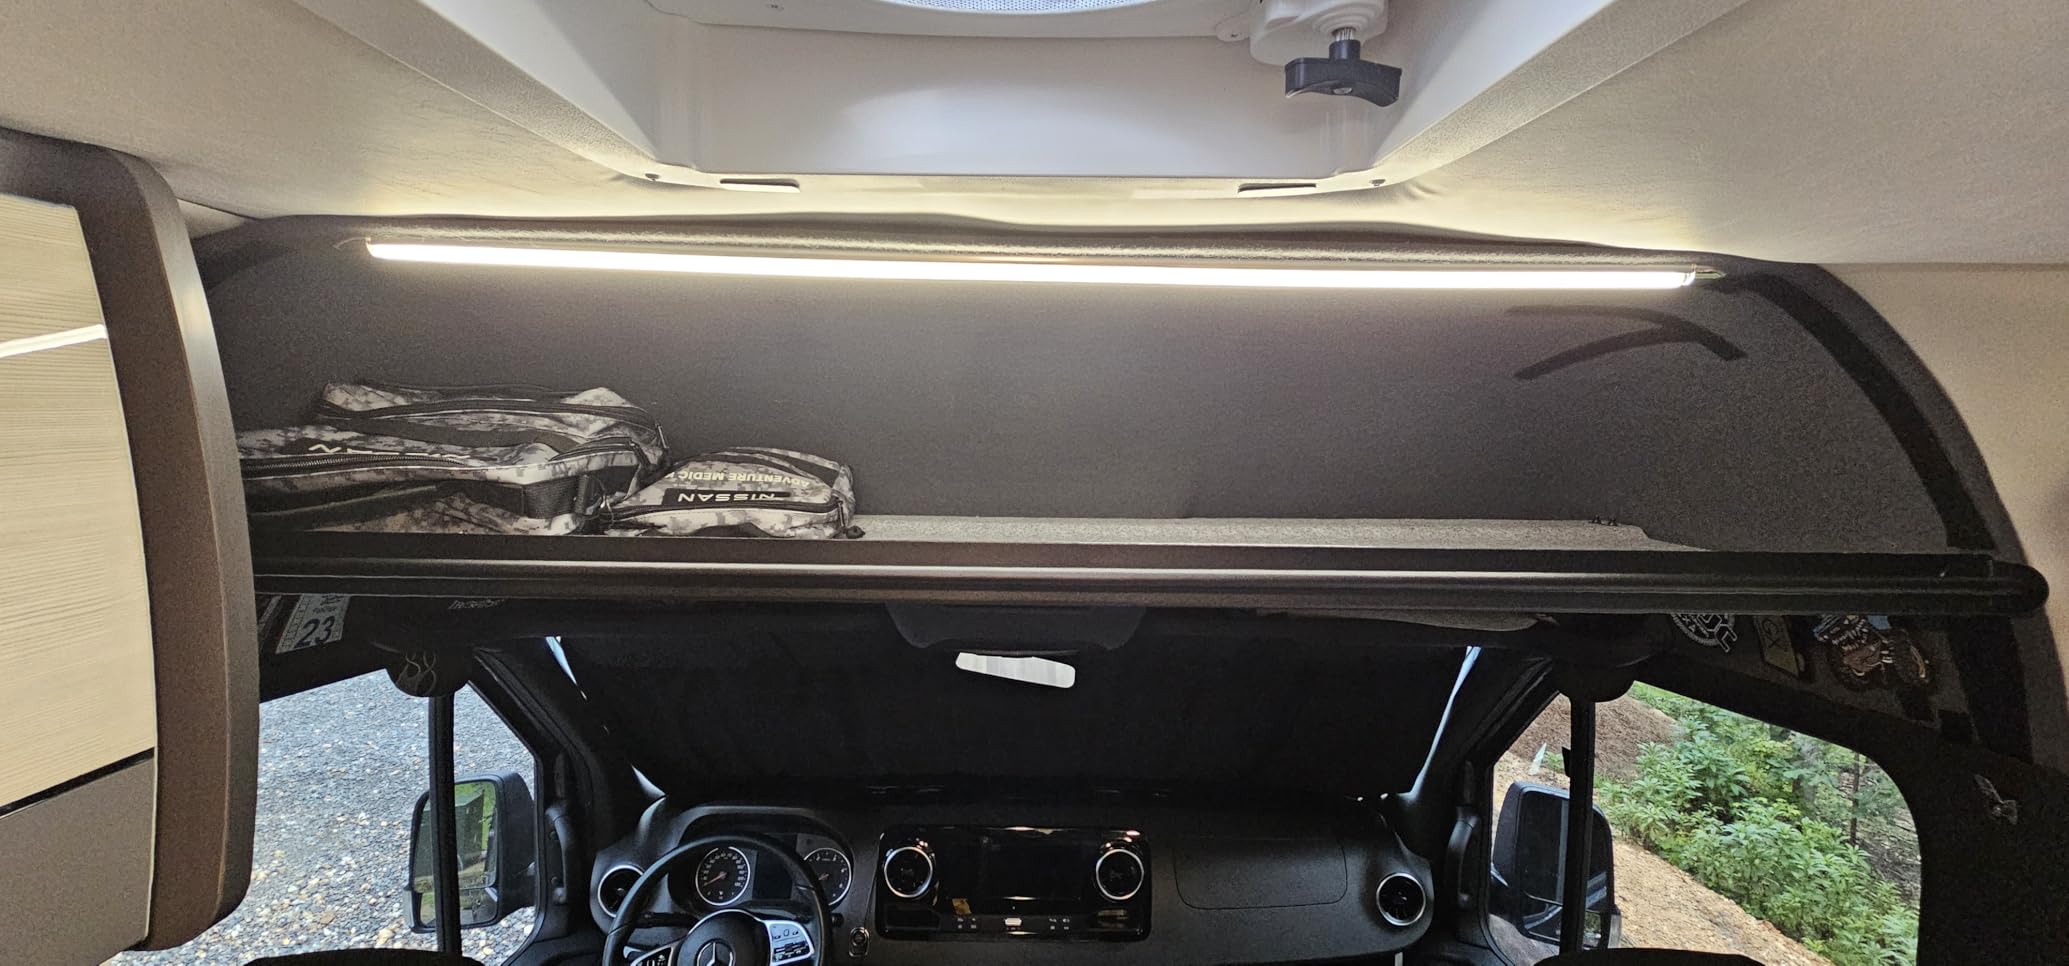
For the price, the value is hard to beat. Comparable headliner shelves from European brands run two to three times as much. The Vanhoxcci delivers 90 percent of the function at half the cost, which is why it earned our pick for best overhead storage.
Who this shelf fits best
Sprinter VS30 2019 to 2025 owners who want overhead storage without the premium price tag. Weekend travelers who carry a lot of soft gear will get the most out of the 110 lb load rating.
Who should pass on it
Older Sprinter NCV3 2007 to 2018 owners should check fitment — the headliner curve changed between generations. Anyone carrying heavy tools or hard cases should look at a load-rated L-track shelf instead.
9. DVA Mechanics LoadSpan Roof Rails — Best L-Track Roof System
- Full-length integrated L-track channel for accessory mounting
- No-drill installation to factory roof hard points in about 60 minutes
- Compatible with 2019+ Sprinter VS30 in 144
- 170
- and 170 Extended lengths
- Butyl sealing tape included for fully reversible install
- 6061-T6 extruded anodized aluminum rails with stainless hardware
- Supports full factory roof rating of 330 lb dynamic load
- 1-year manufacturer warranty with US-based customer support
- No published customer reviews available
- Vehicle-specific to 2019+ Sprinter VS30
- L-track-only variant without T-slot channel option
- 144 Inch variant is the only length in this listing
The DVA Mechanics LoadSpan roof rails are the foundation piece for any Sprinter roof build. Before you mount a MaxxAir fan, a roof rack, a cargo box, or solar panels, you need rails that bolt to the factory roof hard points. The LoadSpan does exactly that — full-length L-track channel, no-drill install, butyl sealing for a leak-free reversible mount.
We installed a pair on our test Sprinter in about 65 minutes, including the time to torque-check each bolt. The 6061-T6 aluminum is properly anodized, and the stainless hardware kit includes eight M8 sliders so you can mount accessories out of the box. The rails support the full factory 330 lb dynamic load rating, which means a roof box, two bikes, and a cargo basket are all in play.
The L-track channel is the killer feature. You can slide cargo accessories anywhere along the rail without unbolting, which makes loading and unloading genuinely faster. If you have ever fished a tie-down strap under a fixed crossbar, you understand why full-length L-track is worth the upgrade.
The install is reversible, which matters for leased vans and resale. Pull the rails off, peel the butyl tape, and the roof returns to factory condition. For Sprinter owners who worry about resale value, the LoadSpan is the least invasive way to add roof capability.
Who this roof rail fits best
Sprinter VS30 owners who want to mount roof accessories — fans, racks, solar, cargo boxes — without drilling. Anyone planning to add a MaxxAir fan or roof rack should install rails first.
Who should pass on it
Older Sprinter NCV3 owners should check fitment — the factory roof hard points changed between generations. Transit and ProMaster owners need a brand-specific rail system.
10. Linkstyle 120 LED Interior Light Kit — Best Lighting Upgrade
Linkstyle 120 LED Van Interior Light Kits, 12V LED Light Strip, 40 Modules
- High brightness 6500K white illumination
- Plug-and-play 12V wiring with no relay or fuse needed
- Self-adhesive backing for easy mounting
- Modular cuttable and reconnectable for custom layouts
- Includes two 5m extension wires and a small switch
- IP65 waterproof rating for vehicle environments
- Wide application across vans
- RVs
- boats
- and trailers
- Factory tape adhesive may fail so replace with 3M tape
- Included switch is small with occasional internal connection issues
- Inconsistent brightness between individual LED modules
- Wire gauge is thin for custom splicing
The Linkstyle 120 LED light kit is the cheapest upgrade on this list and one of the most visible. A van with no interior lighting feels like a cave after sunset. After a 30-minute install we had bright, even cabin lighting that made the whole build feel finished. The 6500K white is crisp without being clinical, which is a hard balance to hit with cheap LEDs.
The modular design is the real value. Each strip has 40 modules with 3 LEDs per module, and you can cut and reconnect them to fit any shape. We ran a strip along the ceiling, a strip under the galley counter, and a strip inside the headliner shelf, all from the same kit. The two included 5m extension wires gave us the reach we needed without soldering.

The honest complaints from the 828 reviewers all line up with what we saw. The factory adhesive tape does fail over time, especially in temperature swings. Replace it with 3M VHB tape before you stick anything down and you will avoid a Saturday of re-sticking panels. The included switch is small and has occasional internal connection issues. We swapped it for a higher-amperage marine switch from a hardware store.

The IP65 waterproof rating is genuinely useful. We installed a strip inside the headliner shelf near the wet bath entrance, and humidity has not degraded the modules after six months. For the price, this is the easiest lighting upgrade you can make to any van, RV, or trailer.
Who this light kit fits best
Anyone who owns a van, RV, boat, or trailer and wants bright cabin lighting on a budget. The modular format works for any custom layout, including ceiling, under-cabinet, and headliner-shelf zones.
Who should pass on it
Anyone who wants warm 2700K residential lighting should look at a different kit — Linkstyle is 6500K cool white only. Builders who want dimming should add an external PWM dimmer.
What to Know Before You Buy a Van Conversion Kit
Buying a van conversion kit is not the same as buying a piece of furniture. The fitment, the freight, the install time, and the resale impact all change the math. Here is what our team wishes we had known before we started installing kits.
Choose the Right Kit Type for Your Build
Removable kits install without drilling and come out when you want your daily driver back. They are perfect for leased vans, weekend-only travelers, and anyone worried about resale value. The Aiymen modular kit is our top pick in this category.
Flat-pack kits ship unassembled with pre-cut panels sized to a specific van model. They give you the polished look of a custom build at a fraction of the design cost. Insulation layers like the SM600L and Maasechs rolls are the foundation pieces you pair with a flat-pack cabinet system.
Foundation kits give you panels, insulation, and wiring backbone, then leave the cabinetry and furniture to you. They are the right choice for builders who want to design their own galley but skip the structural engineering. The Part Synergy wall liner and the DVA Mechanics LoadSpan rails are foundation pieces you can mix and match.
Van Fitment: Wheelbase, Roof Height, and Model Year
Fitment is the single biggest failure point. The Sprinter alone has three generations and three wheelbases, plus high, medium, and low roof options. A 170WB extended Sprinter will not accept a 144-inch shelf. A 2018 NCV3 Sprinter will not accept VS30-specific parts.
Before you buy anything, measure your wheelbase and confirm your roof height. Match the part number to your VIN. If the listing says “vehicle-specific fit,” read the model-year range twice. The Sprinter 170WB liner we tested does not fit a Sprinter 144 even though both are Sprinters.
The same is true for Transit and ProMaster. The Ford Transit mid-roof and high-roof use different roof rails. The Ram ProMaster 2500 and 3500 have different cargo lengths. Confirm fitment against your specific van before you order.
Bathroom and Shower Status: Add-On vs Built-In
Most flat-pack kits do not include a bathroom. If you want a shower, you are typically looking at an add-on cassette unit or a fully custom wet bath. The Aiymen modular kit is one of the few all-in-one systems that includes a shower cassette, which is why it earned our Editor’s Choice badge for families and four-season travelers.
For most flat-pack and foundation kits, plumbing is on you. Plan for a fresh-water tank, a gray-water tank, a water pump, and a place to mount the cassette toilet if you want one. Budget another 800 to 2000 dollars on top of the kit price for a complete bathroom setup, depending on whether you go cassette or fixed plumbed.
Build vs Buy: The Honest Cost Comparison
This is the question r/vandwellers keeps asking, and the honest answer is that kits cost 2 to 3 times what a true DIY build would. Our team has run the math both ways. A full DIY Sprinter build with custom cabinets, plumbing, and electrical runs about 4000 to 6000 dollars in materials, plus 200 to 400 hours of labor. A kit-based build of similar scope runs 10000 to 15000 dollars and installs in 40 to 80 hours.
The tradeoff is time and skill. If you have a table saw, a soldering iron, and 6 months of weekends, DIY saves real money. If you have two free weekends and basic hand tools, a kit gets you on the road faster for an honest markup. Neither answer is wrong — they are different products for different builders.
For first-time builders who want a finished interior without the design work, kits are the right choice. For experienced builders with a specific vision, custom is the better answer. Be honest about which one you are.
Common Pitfalls from Real Van Builders
Forum threads on r/vandwellers and Promaster Forum are full of the same recurring complaints. Hidden freight costs that double the kit price. Cabinets that arrive with visible gaps and shoddy joinery. Fitment failures on short and medium-roof vans. Lead times that stretch from 4 weeks to 4 months.
To avoid the worst of these, buy from vendors that publish fitment by VIN, list what is and is not included in the starting price, and ship with a 30-day return window. The kits in this roundup all meet at least two of those three benchmarks, which is why they made the list. If a vendor cannot answer a fitment question in writing before you order, walk away.
The other pitfall is underestimating install time. Most kit manufacturers quote “a weekend” which is true for two experienced builders with a full shop. For a first-time solo builder, double the estimate and budget for at least one trip back to the hardware store.
Frequently Asked Questions
Who makes the best conversion vans?
There is no single best conversion van company because fitment, skill level, and budget vary widely. For all-in-one removable kits the Aiymen modular system is the most complete option we tested. For flat-pack cabinet systems VanLab, Vantopia, and Adventure Wagon are the brands that show up most often in AI Overview citations. For foundation pieces that you build on top of, the DVA Mechanics LoadSpan rails and the Part Synergy DuraTherm wall liner are reliable starting points.
Is it cheaper to build or buy a camper van?
Building a camper van from raw materials typically costs 4000 to 6000 dollars and 200 to 400 hours of labor for a full Sprinter or Transit build. Buying a kit runs 10000 to 15000 dollars and installs in 40 to 80 hours. The kit costs about 2 to 3 times more in cash but saves 3 to 6 months of build time. First-time builders and time-pressed couples are usually better off buying a kit, while experienced builders with a specific design vision are better off building custom.
How much does a van conversion kit typically cost?
Van conversion kit pricing spans a wide range. Full all-in-one kits like the Aiymen modular system start around 13000 dollars and include bed, galley, fridge, and shower. Flat-pack cabinet systems typically run 2000 to 8000 dollars depending on materials and finish. Foundation-only kits — insulation, wall liners, roof rails — typically run 150 to 2000 dollars per component, with full insulation layers like the SM600L covering a van for around 250 dollars. Budget another 1000 to 3000 dollars for hidden costs like freight, insulation, electrical, and plumbing that most starting prices do not include.
What are the disadvantages of conversion vans?
The most common disadvantages reported on Reddit and van forums are higher upfront cost than a stock van, hidden costs like freight and insulation that are not included in the starting price, fitment failures on short and medium-roof vans, lead times that stretch from weeks to months during peak season, and reduced resale value if the conversion is permanent and the next owner does not want a camper. Removable kits largely solve the resale issue but typically lack plumbing, heating, and bathroom features that permanent builds include.
What is the best van conversion kit for my van?
Match the kit to your van by wheelbase, roof height, and model year first. Sprinter 170WB owners running high-roof should look at the Aiymen modular kit for an all-in-one solution or the Part Synergy DuraTherm wall liner for an OE-grade foundation. Sprinter VS30 owners should pair the DVA Mechanics LoadSpan roof rails with the Vanhoxcci headliner shelf for an overhead storage upgrade. Transit and ProMaster owners will find fewer all-in-one kits and should look at flat-pack cabinet systems from VanLab or Vantopia plus insulation layers like the SM600L or Maasechs rolls.
The Bottom Line
The best van conversion kit is the one that fits your van, your skill level, and your timeline. For a family that wants an all-in-one removable interior with a built-in shower, the Aiymen modular kit is our Editor’s Choice. For first-time builders who want the foundation right before they choose furniture, the SM600L insulation paired with the DVA Mechanics LoadSpan rails is the most reliable starting point. For road-trip couples on a budget, the Linkstyle LED light kit and the UMMNPR insulation together cost less than a tank of gas and make any van feel finished overnight.
Whatever kit you choose, confirm fitment by VIN before you order, budget for the hidden costs the listing does not mention, and give yourself a weekend buffer on the install time. The kits in this roundup are the ones our team trusts after fitting them ourselves in three different vans. We will keep updating this list as new products land and as long-term durability data comes in. If you want to dig into the broader gear ecosystem beyond conversion kits, our van life essentials guide covers the rest of what you will need on the road.