There is nothing quite like the smell of freshly baked chocolate chip cookies wafting through your home. After fifteen years of baking for my family, neighbors, and countless holiday gatherings, I have tested dozens of chocolate chip cookie recipe variations to find the one that works every single time. This is that recipe: no fancy techniques, no hours of chilling, just perfectly soft centers with those crispy edges we all crave.
I used to think great cookies required complicated steps or secret ingredients only professional bakers knew about. The truth is much simpler. When you understand how each ingredient works together and follow a few key principles, you can make bakery-quality cookies in your own kitchen. Whether you are baking for an after school snack, a potluck dessert, or your annual cookie exchange, this recipe will become your go-to.
If you are looking for other dessert pairings for your next gathering, this recipe pairs beautifully with any meal.
Table of Contents
Why This Chocolate Chip Cookie Recipe Works
The secret to exceptional cookies lies in the balance of ingredients and technique. This recipe uses more brown sugar than white sugar, which creates that signature chewy texture and adds a subtle caramel flavor that makes people ask for seconds. The butter is creamed just enough to incorporate air without over-mixing, and we use an extra egg yolk for richness and structure.
What sets this apart from other recipes is the no-chill requirement. I know the frustration of wanting cookies now but seeing a recipe that demands two hours of refrigeration. Through careful testing, I developed a dough that holds its shape beautifully without chilling, meaning you can go from craving to eating warm cookies in under thirty minutes.
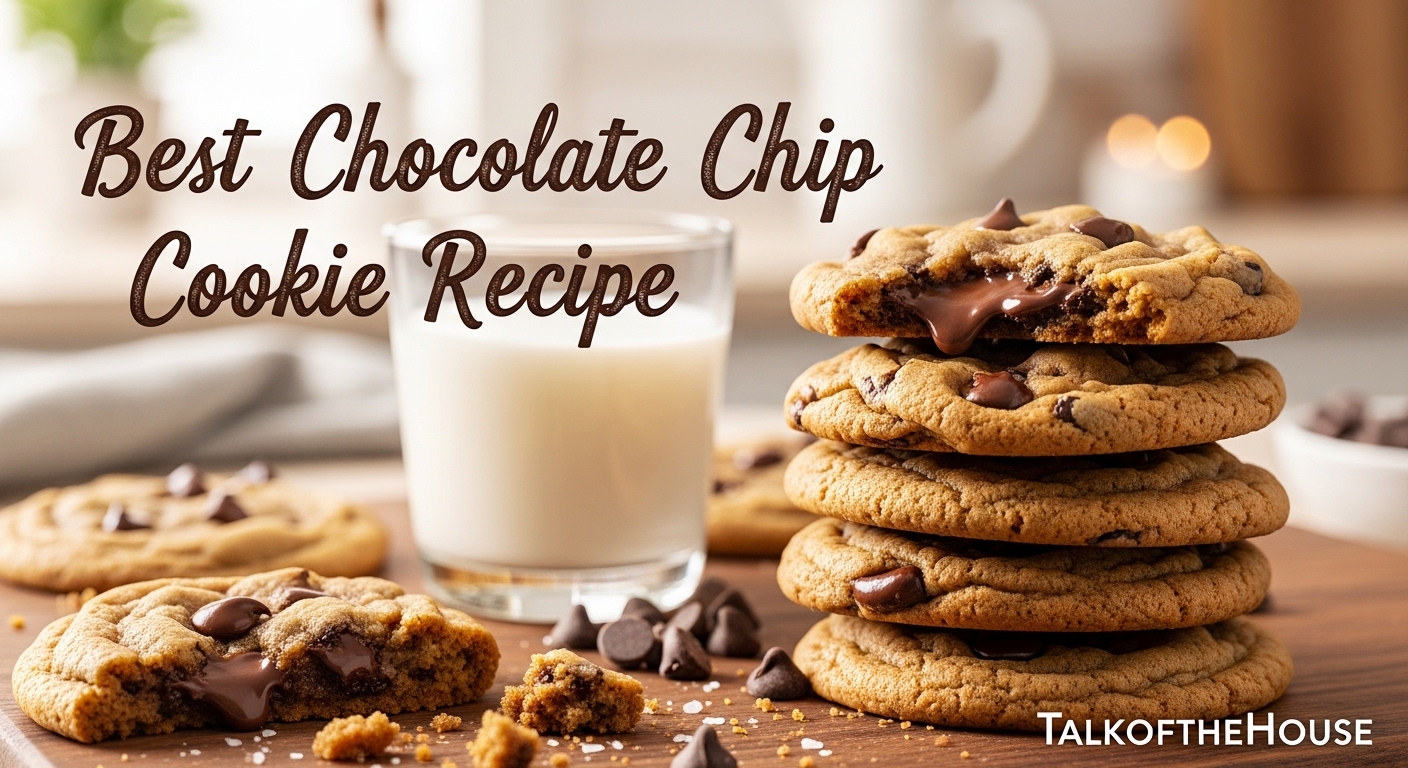
The texture achieves what I consider the ideal cookie trifecta: slightly crispy outer edges that give way to a soft, almost doughy center with melted pockets of chocolate throughout. It is the kind of cookie that breaks gently when you pull it apart, revealing those gooey chocolate layers inside.
Ingredients for the Best Chocolate Chip Cookies
Quality ingredients make a noticeable difference in your final results. Use real butter, not margarine, and splurge on good vanilla extract since it provides much of the flavor base. For chocolate, I prefer a mix of semisweet chips and dark chocolate chunks for varied melting points and depth of flavor.
Dry Ingredients
- 2 1/4 cups (280g) all-purpose flour, spooned and leveled
- 1 teaspoon baking soda
- 1 teaspoon sea salt
- 1 teaspoon cornstarch (the secret to extra softness)
Wet Ingredients
- 3/4 cup (170g) unsalted butter, softened to room temperature
- 3/4 cup (150g) packed dark brown sugar
- 1/2 cup (100g) granulated sugar
- 1 large egg plus 1 egg yolk, room temperature
- 2 teaspoons pure vanilla extract
Mix-Ins
- 1 1/2 cups (255g) semisweet chocolate chips
- 1/2 cup (85g) dark chocolate chunks or chopped chocolate bar
- Flaky sea salt for topping (optional but recommended)
That cornstarch might seem unusual, but it is a game-changer. It tenderizes the flour proteins, creating a softer, more tender cookie that stays chewy for days rather than turning crispy or crumbly.
How to Make Chocolate Chip Cookies
Follow these steps carefully for the best results. I have included visual cues and timing to help even beginner bakers succeed on their first attempt.
Step 1: Prepare Your Equipment
Preheat your oven to 375 degrees Fahrenheit (190 degrees Celsius). Position your oven racks in the upper and lower thirds of the oven for even baking. Line two baking sheets with parchment paper or silicone baking mats. Parchment paper prevents sticking and makes cleanup effortless.
Step 2: Mix the Dry Ingredients
In a medium bowl, whisk together the flour, baking soda, salt, and cornstarch until well combined. Set this aside. Whisking aerates the flour and ensures the leavening and salt distribute evenly throughout the dough.
Step 3: Cream the Butter and Sugars
In a large bowl or the bowl of a stand mixer fitted with the paddle attachment, beat the softened butter, brown sugar, and granulated sugar together on medium speed for 2 to 3 minutes. The mixture should look light and fluffy, almost like a thick frosting.
Do not rush this step. Proper creaming incorporates air into the dough, which helps the cookies rise and creates that desirable texture. The color should visibly lighten from a dark caramel to a lighter tan.
Step 4: Add Eggs and Vanilla
Beat in the whole egg, egg yolk, and vanilla extract until fully combined. The mixture should look smooth and cohesive. Scrape down the sides and bottom of the bowl with a spatula to ensure everything mixes evenly.
Step 5: Combine Wet and Dry Ingredients
With the mixer on low speed, gradually add the dry ingredient mixture to the wet ingredients. Mix just until you no longer see streaks of flour. Over-mixing at this stage develops gluten, which creates tough, cakey cookies instead of tender ones.
Step 6: Fold in the Chocolate
Using a wooden spoon or rubber spatula, gently fold in the chocolate chips and chunks. Distribute them evenly throughout the dough so every cookie has plenty of chocolate. I like to reserve a few tablespoons of chocolate to press into the tops of the dough balls before baking for that professional bakery look.
Step 7: Portion the Dough
Scoop dough using a 1.5 tablespoon cookie scoop or roll into balls about 1.5 inches in diameter. Place dough balls on your prepared baking sheets, spacing them about 2 inches apart to allow for spreading. For extra thick cookies, make the dough balls taller than they are wide.
Step 8: Bake Until Perfectly Done
Bake for 9 to 11 minutes, rotating the pans halfway through if your oven has hot spots. The cookies are done when the edges look set and golden brown, but the centers still look slightly underbaked and puffy.
This is the most critical step. Remove the cookies from the oven when they look just barely done. They will continue cooking on the hot baking sheet after you remove them from the oven. Waiting until they look fully baked in the oven results in overbaked, crispy cookies.
Step 9: Cool and Enjoy
Let the cookies rest on the baking sheet for 5 minutes. This allows them to set up enough to transfer without breaking. Then move them to a wire rack to cool completely, or enjoy them warm while the chocolate is still molten.
Pro Tips for Perfect Cookies Every Time
Measure Flour Correctly
The most common mistake in cookie baking is using too much flour. Always spoon flour into your measuring cup, then level it off with a straight edge. Scooping directly from the bag compacts the flour, leading to dry, crumbly cookies. For absolute consistency, use a kitchen scale and measure 280 grams.
Butter Temperature Matters
Your butter should be soft enough to leave an indent when pressed with a finger, but not melted or greasy. If your butter is too cold, it will not cream properly with the sugar. If it is too warm, the cookies will spread excessively and turn out thin and crispy.
Use Room Temperature Eggs
Cold eggs can cause the butter to seize up, creating an uneven dough texture. Set your eggs on the counter for 30 minutes before baking, or place them in warm water for 5 minutes to quickly bring them to room temperature.
Do Not Overbake
Pull your cookies from the oven when the edges are set but the centers still look puffy and slightly underdone. They will deflate and finish cooking on the hot pan during the cooling period. This technique is what creates that perfect soft center with crispy edges contrast.
Space Your Cookies Properly
Give your cookies room to spread. Two inches between dough balls is the minimum spacing needed. Crowded cookies merge together and bake unevenly, creating one giant cookie sheet instead of individual treats.
Troubleshooting Common Cookie Problems
Even experienced bakers encounter cookie issues occasionally. Here is how to diagnose and fix the most common problems so your next batch turns out perfectly.
Why Are My Cookies Flat and Spread Too Much
Flat cookies usually indicate butter that was too warm or melted when you started. The fat loses its structure and pools out during baking. Check your butter temperature next time. If your kitchen is warm, chill the dough for just 15 minutes before baking to help the butter firm up.
Expired baking soda is another culprit. Test your leavening agent by putting a spoonful in vinegar. If it does not fizz immediately, replace it. Old baking soda loses its lifting power, causing cookies to spread without rising.
Why Are My Cookies Dry and Crumbly
Dry, crumbly cookies almost always mean too much flour was used. Remember to spoon and level, never scoop from the bag. Overbaking also causes dryness. Those extra two minutes in the oven remove moisture you cannot get back.
If you followed the recipe exactly and still have dry cookies, your oven might run hot. Use an oven thermometer to verify the actual temperature matches your setting. Many home ovens are off by 25 degrees or more.
Why Did My Cookies Burn on the Edges but Stay Raw in the Middle
This happens when dough balls are too large or placed too close together. The outer edges receive direct heat while the centers steam from neighboring cookies. Use the recommended dough size and spacing for even baking throughout.
Why Are My Cookies Cakey Instead of Chewy
Cakey texture comes from over-mixing the dough after adding flour, which develops gluten structure. Mix just until the flour disappears. Adding too much egg can also create a cake-like texture. Make sure you are using one whole egg plus one yolk, not two whole eggs.
Why Did My Chocolate Chips Sink to the Bottom
Chocolate sinks when the dough is too thin or warm. Toss your chocolate chips in a teaspoon of flour before folding them in. The light coating helps them suspend throughout the cookie instead of dropping.
Ingredient Substitutions and Variations
Adapt this chocolate chip cookie recipe to suit dietary needs or experiment with new flavors using these tested substitutions.
Chocolate Options
Replace semisweet chips with milk chocolate for a sweeter cookie, or use bittersweet chocolate for deeper flavor. Chopped chocolate bars create irregular puddles of melted chocolate that many bakers prefer over uniform chips. White chocolate with macadamia nuts is a classic variation.
Sugar Swaps
Use all dark brown sugar for extra chewiness and molasses flavor, or substitute coconut sugar for a lower glycemic option. The cookies will spread slightly more with coconut sugar and have a subtle caramel taste.
Gluten-Free Version
Substitute a 1-to-1 gluten-free baking flour blend containing xanthan gum. King Arthur Measure for Measure and Bob’s Red Mill 1-to-1 both work well. The cookies may spread slightly more, so chill the dough for 20 minutes before baking.
Dairy-Free and Vegan Options
Replace butter with solid coconut oil or vegan butter sticks at a 1-to-1 ratio. Use a flax egg instead of regular eggs by mixing 1 tablespoon ground flaxseed with 3 tablespoons water, letting it sit for 5 minutes to gel. Ensure your chocolate chips are dairy-free.
Flavor Add-Ins
Add 1/2 cup chopped walnuts or pecans for crunch. Stir in 1 teaspoon espresso powder to enhance the chocolate flavor without making the cookies taste like coffee. A pinch of cinnamon or 1/2 teaspoon almond extract creates interesting flavor variations.
How to Store and Freeze Chocolate Chip Cookies
Proper storage keeps your cookies fresh and delicious for days or even months. Here is how to handle leftovers and plan ahead for busy times.
Storing Baked Cookies
Store completely cooled cookies in an airtight container at room temperature for up to 5 days. Place a slice of bread in the container to keep cookies soft. The bread absorbs moisture from the air, preventing the cookies from drying out. Replace the bread slice every day or two.
Freezing Baked Cookies
Freeze baked cookies for up to 3 months. Arrange cooled cookies in a single layer on a baking sheet and freeze until solid, about 2 hours. Transfer to a freezer-safe bag or container with parchment paper between layers. Thaw at room temperature for 30 minutes or warm in a 300 degree oven for 5 minutes.
Freezing Cookie Dough
Freeze unbaked dough balls for fresh cookies anytime. Scoop dough onto a parchment-lined baking sheet and freeze until solid. Transfer to a freezer bag and store up to 3 months. Bake directly from frozen, adding 2 to 3 minutes to the baking time. This is perfect for unexpected guests or sudden cravings.
Make-Ahead Strategy
For holiday baking or events, prepare dough up to 3 days ahead and refrigerate in an airtight container. Let it sit at room temperature for 20 minutes before scooping and baking. The dough actually develops better flavor after resting as the flour fully hydrates and flavors meld.
Frequently Asked Questions
What is the secret to making the best chocolate chip cookies?
The secret is using more brown sugar than white sugar for chewiness, adding cornstarch for tenderness, using an extra egg yolk for richness, and removing the cookies from the oven when they look slightly underbaked. Let them finish cooking on the hot pan for perfect soft centers with crispy edges.
What ingredients are in chocolate chip cookies?
Basic chocolate chip cookies require all-purpose flour, baking soda, salt, butter, brown sugar, granulated sugar, eggs, vanilla extract, and chocolate chips. This recipe also includes cornstarch for extra softness and uses both semisweet chips and dark chocolate chunks for the best flavor and texture.
What is the trick to making soft chocolate chip cookies?
For soft cookies, use more brown sugar than white sugar, add cornstarch to the flour mixture, include an extra egg yolk, and do not overbake. Remove cookies when the edges are set but centers still look puffy and underdone. They will finish cooking on the hot pan.
What is the 321 cookie rule?
The 321 cookie rule refers to a simple ratio for drop cookies: 3 parts flour, 2 parts fat, 1 part sugar. While this is a helpful baseline, great chocolate chip cookies typically use slightly more sugar and include eggs and leavening for the best texture and flavor.
Can you freeze chocolate chip cookie dough?
Yes, cookie dough freezes excellently for up to 3 months. Scoop dough balls onto a baking sheet, freeze until solid, then transfer to a freezer bag. Bake directly from frozen, adding 2 to 3 minutes to the baking time. This lets you bake fresh cookies anytime.
How long do you bake chocolate chip cookies?
Bake chocolate chip cookies at 375 degrees Fahrenheit for 9 to 11 minutes. The cookies are done when the edges look set and golden brown, but the centers still appear slightly underbaked and puffy. They will continue cooking on the hot pan after removal.
Why do my chocolate chip cookies go flat?
Flat cookies usually result from butter that is too warm or melted, expired baking soda, or not enough flour. Ensure your butter is softened but not greasy, test your baking soda for freshness, and measure flour correctly by spooning and leveling rather than scooping.
What temperature should chocolate chip cookies be baked at?
The ideal temperature for chocolate chip cookies is 375 degrees Fahrenheit (190 degrees Celsius). This temperature is hot enough to set the edges quickly while allowing the centers to remain soft, creating the perfect texture contrast between crispy edges and chewy centers.
How do you keep chocolate chip cookies soft?
Store cooled cookies in an airtight container with a slice of bread to maintain moisture. The bread absorbs excess air moisture, keeping cookies soft for up to 5 days. You can also slightly underbake cookies and warm them briefly before serving to restore softness.
What is the best chocolate to use for cookies?
Use a combination of semisweet chocolate chips and dark chocolate chunks or chopped chocolate bars. The chips hold their shape while chunks create melty pockets. Choose chocolate with 50-60% cacao for balanced sweetness. High-quality chocolate makes a noticeable difference in flavor.
Final Thoughts on This Chocolate Chip Cookie Recipe
Great chocolate chip cookies do not require professional training or expensive equipment. They require understanding how ingredients work together and respecting a few key techniques. This recipe has been my reliable companion through birthday parties, holiday gatherings, and countless ordinary Tuesdays when only a warm cookie would do.
Once you master this base recipe, feel free to experiment with add-ins and variations. The foundation will remain solid no matter how you customize it. If you are planning a full menu and need dessert ideas that complement your main course, these cookies are always a crowd-pleaser.
I would love to hear how your cookies turn out. Share your results, ask questions, or tell me about your favorite variations. Happy baking!