Have you ever ordered chicken parmesan at a restaurant, marveled at that perfectly crispy, golden coating, then tried to recreate it at home only to end up with a soggy, disappointing mess? I have been there more times than I care to admit. For years, my homemade chicken parmesan recipe resulted in breading that fell off, sauce that turned the crust mushy, and chicken that was either raw in the middle or dry as cardboard.
After testing dozens of methods, consulting with home cooks on forums, and experimenting in my kitchen, I finally cracked the code. This chicken parmesan recipe delivers restaurant-quality results every single time. The chicken stays impossibly crispy even after baking with sauce and cheese. The meat remains juicy and tender. And that cheese pull? Absolutely Instagram-worthy.
In this guide, I will walk you through every step of making the best chicken parmesan you have ever tasted. You will learn the five secrets chefs use for crispy coating, how to troubleshoot common problems like soggy breading, and tips for making this ahead for busy weeknights. Whether you are cooking for a special Sunday dinner or a simple family meal, this recipe will become your new go-to.
Table of Contents
Recipe at a Glance
This chicken parmesan recipe takes about 45 minutes from start to finish, making it perfect for weeknight dinners while impressive enough for guests. Here is what you need to know before starting:
Yield: 4 servings
Prep Time: 20 minutes
Cook Time: 25 minutes
Total Time: 45 minutes
Difficulty: Intermediate
Calories per serving: Approximately 580
What You Need for Chicken Parmesan
The key to exceptional chicken parmesan starts with quality ingredients. While you can substitute in a pinch, these specific components create the magic combination of crispy, juicy, and cheesy that makes this dish unforgettable.
For the Chicken
- 4 boneless skinless chicken breasts (about 6 oz each)
- 1 cup all-purpose flour
- 3 large eggs
- 2 tablespoons water
- 1 cup panko breadcrumbs (Japanese style for extra crunch)
- 1 cup Italian breadcrumbs (for flavor and traditional texture)
- 1 cup freshly grated Parmesan cheese, divided
- 2 teaspoons Italian seasoning
- 1 teaspoon garlic powder
- 1 teaspoon salt
- 1/2 teaspoon black pepper
- 1/2 cup olive oil (for frying)
For the Topping
- 2 cups marinara sauce (homemade or high-quality store-bought like Rao’s or San Marzano-based)
- 8 oz fresh mozzarella cheese, sliced (not pre-shredded)
- 4 slices provolone cheese (adds depth and meltability)
- 1/4 cup fresh basil leaves (for garnish)
Ingredient Quality Notes
Fresh mozzarella makes a significant difference in both flavor and that perfect cheese pull. Look for mozzarella packed in water, not the dry pre-shredded variety. For the sauce, San Marzano tomatoes create a sweeter, less acidic base that complements the crispy chicken without overwhelming it.
When it comes to parmesan, buy a block and grate it yourself. Pre-grated parmesan contains anti-caking agents that prevent smooth melting. The combination of panko and Italian breadcrumbs is my secret weapon – panko provides the crunch while Italian breadcrumbs add seasoning and help the coating adhere better.
Essential Equipment
Having the right tools makes chicken parmesan significantly easier and more consistent. Here is what I recommend:
- Large oven-safe skillet (12-inch cast iron or stainless steel) – for frying and baking in one pan
- Meat mallet or rolling pin – for pounding chicken to even thickness
- Three shallow dishes – for your dredging station
- Instant-read thermometer – essential for perfectly cooked chicken without guessing
- Wire cooling rack – for resting breaded chicken before frying
- Baking dish (if not using oven-safe skillet) – 9×13 inch works perfectly
The instant-read thermometer is non-negotiable in my kitchen. Chicken must reach 165°F internally to be safe, but overcook it and you will have dry meat. The thermometer removes all guesswork.
How to Make Chicken Parmesan
Follow these six steps for perfect chicken parmesan every time. I have integrated troubleshooting tips directly into the instructions so you can prevent problems before they happen.
Step 1: Prepare the Chicken
Place each chicken breast between two sheets of plastic wrap or inside a large resealable bag. Pound to 1/3-inch thickness using a meat mallet or the smooth side of a rolling pin. Work from the center outward for even thickness.
This step is crucial for even cooking. Thick spots stay raw while thin areas overcook. The 1/3-inch thickness is the sweet spot – thin enough to cook through quickly, thick enough to stay juicy.
Pat chicken completely dry with paper towels. I cannot stress this enough: moisture is the enemy of crispy coating. Even a small amount of surface moisture will prevent the flour from adhering properly, leading to breading that falls off during cooking.
Step 2: Set Up Your Dredging Station
Arrange three shallow dishes side by side on your counter. This assembly-line approach makes breading efficient and less messy.
In Dish 1, combine flour with 1/2 teaspoon salt and 1/4 teaspoon pepper. In Dish 2, whisk together eggs and water until completely blended. The water thins the egg wash slightly, helping it coat the chicken evenly without being too thick.
In Dish 3, mix panko breadcrumbs, Italian breadcrumbs, 1/2 cup grated Parmesan, Italian seasoning, and garlic powder. The cheese in the breading creates an extra-crispy, flavorful crust that tastes like restaurant quality.
Step 3: Bread the Chicken Cutlets
Dredge each chicken breast in the flour mixture, shaking off any excess. The flour creates a dry surface for the egg to adhere to. Dip the floured chicken into the egg wash, letting excess drip off for a few seconds.
Press the chicken firmly into the breadcrumb mixture, coating both sides thoroughly. Use your hands to press the breadcrumbs into the meat – this mechanical bonding helps the coating stay put during cooking.
Place breaded chicken on a wire rack and let rest for 10-15 minutes at room temperature. Do not skip this resting period. It allows the egg wash to set and bind the breadcrumbs to the chicken. Forum cooks consistently mention this step as the difference between breading that stays on and breading that falls off.
Step 4: Pan-Fry to Golden Perfection
Heat olive oil in a large oven-safe skillet over medium-high heat until shimmering but not smoking. The oil should coat the bottom of the pan about 1/4 inch deep. Test the temperature by dropping a breadcrumb in – it should sizzle immediately.
Carefully add chicken cutlets to the hot oil, working in batches if needed. Do not crowd the pan. Overcrowding lowers the oil temperature, leading to greasy, soggy chicken instead of crispy perfection. Each piece needs space for the moisture to escape.
Cook 3-4 minutes per side until deep golden brown and crispy. Resist the urge to move the chicken around. Let it sit undisturbed so the crust can set. When you see golden edges forming around the bottom, it is ready to flip.
Transfer fried chicken to a paper towel-lined plate to drain excess oil. The chicken will not be fully cooked through yet – that is intentional. It finishes cooking in the oven with the cheese.
Step 5: Assemble and Bake
Preheat your oven to 450°F (230°C). This high temperature is essential for crispy chicken parmesan. A lower temperature will melt the cheese but steam the coating, creating the dreaded soggy texture we are avoiding.
Arrange fried chicken in a baking dish or keep it in your oven-safe skillet. Here is where most recipes go wrong: the sauce amount. Spoon only 2 tablespoons of marinara over each piece. Resist the urge to use more or to pour sauce under the chicken.
Top each piece with one slice of provolone and fresh mozzarella. The provolone adds a sharp, melty quality while fresh mozzarella provides that stretchy cheese pull everyone loves. Sprinkle the remaining 1/2 cup grated Parmesan over the top.
Bake for 10-12 minutes until cheese is bubbly, melted, and starting to brown in spots. The chicken will reach safe internal temperature during this time. If you want extra browning on top, switch to broil for the final 1-2 minutes – but watch carefully to prevent burning.
Step 6: Rest and Serve
Let chicken parmesan rest for 5 minutes before serving. This brief rest allows the juices to redistribute throughout the meat so they don’t all run out when you cut into it. It also prevents you from burning your mouth on molten cheese – the struggle is real.
Garnish with fresh basil leaves torn by hand. The bright, peppery basil cuts through the richness of the cheese and fried coating perfectly.
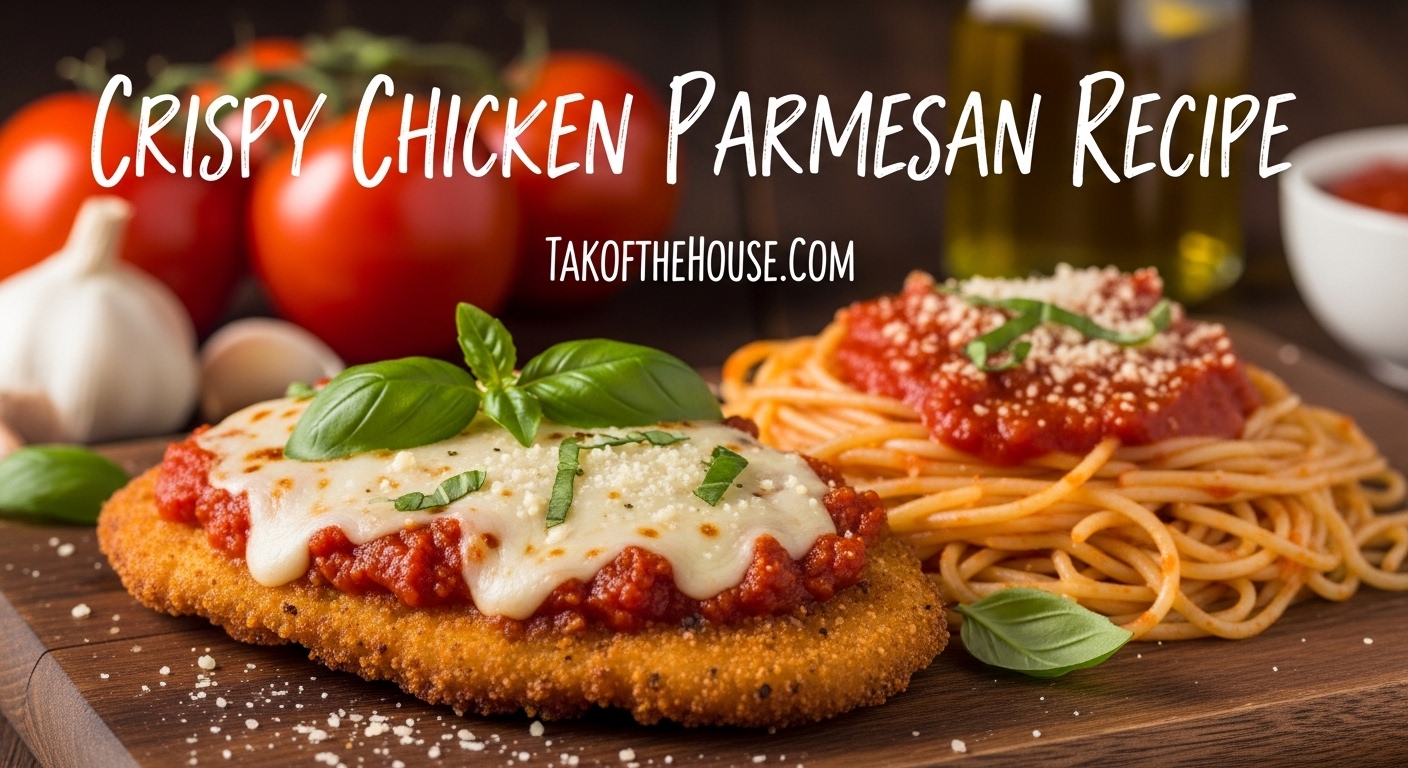
Serve over al dente spaghetti tossed with a little marinara, or alongside a crisp Caesar salad and garlic bread for the full Italian-American experience.
Chef’s Secrets for Perfect Chicken Parm
After years of perfecting this dish, I have identified five secrets that separate restaurant-quality chicken parmesan from home-cooked disappointment. Master these and you will never have soggy chicken again.
Secret #1: The Panko-Parmesan Blend
The mixture of panko and Italian breadcrumbs creates the ideal texture. Panko breadcrumbs are larger and flakier, creating more air pockets that stay crispy. Italian breadcrumbs add seasoning and smaller particles that help the coating adhere to the chicken. Mixing in grated parmesan with the breadcrumbs adds flavor and creates an even crunchier exterior.
Secret #2: Less Sauce, More Crunch
Restaurants often use less sauce than home cooks expect. Only 2 tablespoons of marinara per piece is enough to add moisture and flavor without saturating the crispy coating. For extra insurance against sogginess, try the reverse method: put sauce on top of the cheese rather than directly on the chicken. The cheese acts as a protective barrier.
Secret #3: The Hot Oven Finish
Most home recipes suggest 350°F or 375°F baking temperatures. That is too low. A 450°F oven quickly melts cheese while the dry heat preserves the crispy coating. The high heat also ensures the chicken reaches safe internal temperature without overcooking. Anything lower and you are essentially steaming your hard-earned crispy crust.
Secret #4: Proper Cheese Placement
Using two types of cheese creates the best result. Provolone provides excellent meltability and a sharp flavor that stands up to the rich sauce. Fresh mozzarella adds the creamy, stretchy quality we crave. Place provolone directly on the chicken, then fresh mozzarella on top. The provolone melts into the chicken while the mozzarella creates that beautiful golden blanket.
Secret #5: The Resting Period
Let breaded chicken rest for 10-15 minutes before frying. This step appears in virtually every professional kitchen but is often skipped at home. The rest allows the egg wash to penetrate and bind the breadcrumbs to the meat. Without this rest, your coating will slide off in the pan or during baking. Patience here prevents heartbreak later.
Troubleshooting Common Chicken Parmesan Problems
Even with the best recipe, things can go wrong. Here is how to fix the most common chicken parmesan problems based on real home cook experiences from cooking forums.
Why Is My Chicken Parmesan Soggy?
Soggy chicken parmesan is the number one complaint I see in cooking forums. The culprit is almost always too much sauce or insufficient oven temperature. Here is how to prevent it:
- Use only 2 tablespoons of sauce per piece – resist the urge to smother
- Bake at 450°F, not lower temperatures that create steam
- Put sauce on top of cheese rather than under the chicken
- Do not crowd the pan when frying – moisture from overcrowding creates steam
- Pat chicken completely dry before breading
If your chicken is already soggy, you can partially rescue it by placing it under the broiler for 2-3 minutes. The direct heat will recrisp some of the coating, though it will not be quite as good as doing it right the first time.
How to Keep Breading from Falling Off
Breading separation happens when the coating has not properly bonded to the chicken. Follow these steps to ensure adhesion:
- Let breaded chicken rest 10-15 minutes before frying (this is the most important step)
- Press breadcrumbs firmly into the chicken when coating
- Ensure oil is hot enough before adding chicken – cold oil causes breading to absorb grease and slide off
- Do not flip chicken too early – let the crust set completely on one side before turning
- Avoid moving chicken around in the pan unnecessarily
If you are still having trouble, try the “double dredge” method: flour, egg, breadcrumbs, then a quick dip back in egg and a final breadcrumb coating. This creates a thicker, more durable crust.
Preventing Dry, Overcooked Chicken
Dry chicken usually results from two issues: uneven thickness or overcooking. Pound chicken to uniform 1/3-inch thickness so it cooks evenly. Use an instant-read thermometer and remove chicken from the oven at exactly 165°F internal temperature.
For extra insurance, try salt brining your chicken breasts for 2-3 hours before cooking. Dissolve 3 tablespoons salt in 4 cups water, submerge the chicken, refrigerate, then pat completely dry before breading. This simple step makes chicken significantly more juicy and forgiving if you slightly overcook it.
Fixing Cheese That Won’t Melt Properly
Pre-shredded cheese contains anti-caking agents that prevent smooth melting. Always buy block cheese and shred or slice it yourself. Fresh mozzarella should be at room temperature before baking for best melting. If your cheese is browning before fully melted, cover the dish with foil for the first 5 minutes of baking, then remove for the final browning.
Delicious Variations
Once you master the classic version, try these variations to suit different dietary needs and preferences.
Baked Chicken Parmesan (Healthier Option)
For a lighter version without frying, preheat oven to 400°F. Place breaded chicken on a wire rack set over a baking sheet. Spray or brush lightly with olive oil. Bake for 20-25 minutes until coating is crisp and chicken reaches 165°F. Top with cheese and sauce, then return to oven for 5 minutes until cheese melts. While not quite as crispy as the fried version, this method eliminates most of the oil while keeping good flavor.
Air Fryer Chicken Parmesan
Air fryers create surprisingly crispy results with minimal oil. Preheat air fryer to 380°F. Spray breaded chicken lightly with cooking spray. Cook in batches for 6 minutes per side until golden and crispy. Transfer to oven-safe dish, top with sauce and cheese, then bake at 450°F for 5 minutes or until cheese melts. The air fryer handles the crisping beautifully, though you still need the oven for the cheese melt.
Ingredient Substitutions
Need to adapt this recipe? Here are tested substitutions that work:
- Gluten-free: Use gluten-free all-purpose flour blend and gluten-free breadcrumbs. Add 1 extra egg to help binding since GF breadcrumbs are often drier.
- Dairy-free: Omit parmesan from breading (use nutritional yeast instead). Skip cheese topping or use dairy-free mozzarella alternative. Serve with extra marinara for moisture.
- Different cheese: All mozzarella works fine, or try fontina for extra richness. Avoid cheddar – it separates when melted.
- Chicken thighs: Boneless skinless thighs work beautifully and stay juicier. Pound to same 1/3-inch thickness.
- Panko only: If you only have panko, use 2 cups panko and add 1 extra teaspoon Italian seasoning and 1/2 teaspoon salt.
Make-Ahead and Storage Instructions
Chicken parmesan can absolutely be made ahead, making it perfect for busy weeknights or entertaining. Here is how to prep and store it properly.
Make-Ahead Strategies
Bread the chicken up to 4 hours ahead and keep refrigerated on a wire rack uncovered. The air circulation helps the coating set and actually improves adherence. Do not cover with plastic wrap – trapped moisture creates soggy spots.
Alternatively, fully cook the chicken through the frying step, then cool and refrigerate up to 24 hours. When ready to serve, top with sauce and cheese, then bake at 450°F for 12-15 minutes until heated through and cheese melts. The coating stays surprisingly crispy with this method.
Storage and Leftovers
Store leftover chicken parmesan in an airtight container in the refrigerator for up to 3 days. The coating will soften during storage – this is unavoidable but does not affect flavor.
Freezing Instructions
Chicken parmesan freezes well for up to 3 months. For best results, freeze after the frying step but before adding sauce and cheese. Wrap individual pieces in plastic wrap, then foil, and place in freezer bags. Thaw overnight in refrigerator, then top with sauce and cheese and bake as directed.
You can also freeze fully assembled and baked chicken parmesan. Cool completely, wrap tightly, and freeze. Reheat from frozen at 375°F for 25-30 minutes covered with foil, then 5 minutes uncovered to recrisp.
Reheating for Best Results
For crispy reheating, skip the microwave. Instead, place chicken parmesan on a wire rack over a baking sheet in a 375°F oven for 10-15 minutes until heated through. The wire rack allows air circulation to recrisp the bottom. You can also use a toaster oven for individual portions.
What to Serve With Chicken Parmesan
Complete your Italian-American feast with these classic pairings that balance the richness of the chicken parmesan.
Classic Pairings
- Spaghetti with marinara – The traditional choice. Toss pasta with a little sauce and olive oil, then place chicken on top.
- Caesar salad – The crisp romaine and tangy dressing cut through the richness perfectly.
- Garlic bread – Essential for sauce-mopping. Make it yourself with good butter and fresh garlic.
- Sauteed vegetables – Broccoli rabe with garlic, green beans, or roasted asparagus add color and nutrition.
Wine Pairings
Chicken parmesan pairs beautifully with medium-bodied red wines that complement the tomato sauce without overpowering the chicken. Try a Chianti Classico, Sangiovese, or Barbera. Prefer white? A crisp Pinot Grigio or Vermentino works surprisingly well, especially if you go lighter on the sauce.
Frequently Asked Questions
What is the secret to good chicken parmesan?
The secret to good chicken parmesan is using a mixture of panko and Italian breadcrumbs for the perfect crunch, pounding chicken to even thickness for uniform cooking, using less sauce than you think (only 2 tablespoons per piece), and finishing in a hot 450°F oven to keep the coating crispy while melting the cheese.
What are common mistakes when making chicken parm?
Common mistakes include using too much sauce which makes the chicken soggy, not letting breaded chicken rest before frying which causes breading to fall off, overcrowding the pan when frying which creates steam and soggy coating, baking at too low a temperature, and not patting chicken dry before breading.
How do you keep breading from falling off chicken parmesan?
To keep breading from falling off, let the breaded chicken rest on a wire rack for 10-15 minutes before frying. This allows the egg wash to set. Press breadcrumbs firmly into the chicken when coating. Ensure your oil is hot enough before adding chicken, and don’t flip the chicken too early – let the crust set for 3-4 minutes before turning.
How to keep chicken crispy when making chicken parm?
Keep chicken crispy by using minimal sauce (only 2 tablespoons per piece), baking at 450°F rather than lower temperatures, placing sauce on top of the cheese instead of directly on the chicken, not overcrowding the pan when frying, and ensuring chicken is completely dry before breading.
How to avoid soggy chicken parm?
Avoid soggy chicken parmesan by using less sauce, baking at high temperature, and using the reverse sauce method where sauce goes on top of the cheese rather than under the chicken. Also ensure you don’t crowd the pan when frying, as this creates steam that softens the coating.
What is the difference between chicken parm and chicken parmigiana?
There is no difference between chicken parm and chicken parmigiana. ‘Parm’ is simply the American shortened version of ‘parmigiana.’ Both refer to the same Italian-American dish of breaded chicken cutlets topped with tomato sauce and melted cheese.
What temperature should chicken parmesan be cooked to?
Chicken parmesan should reach an internal temperature of 165°F (74°C) to be fully cooked and safe to eat. Use an instant-read thermometer inserted into the thickest part of the chicken breast. The cheese should be bubbly and starting to brown when properly finished.
Can you make chicken parmesan ahead of time?
Yes, you can bread chicken up to 4 hours ahead and refrigerate uncovered. Alternatively, fry the chicken up to 24 hours ahead, refrigerate, then top with sauce and cheese and bake when ready to serve. Fully assembled chicken parmesan also freezes well for up to 3 months.
You now have everything you need to make restaurant-quality chicken parmesan at home. The secrets are simple: use the panko blend, do not over-sauce, bake hot, and let that breaded chicken rest before frying. Follow these steps and you will never suffer through soggy chicken parm again.
I would love to hear how this chicken parmesan recipe works in your kitchen. Did you try the reverse sauce method? How did the panko-parmesan blend work for you? Leave a comment below and share your results, questions, or any tweaks you discovered.
Happy cooking, and enjoy every crispy, cheesy bite of your perfect chicken parmesan.